
The Ultimate Guide to Everything About Infinite Lux
08/23/2026
As of Friday, 9/18/2026, Ekko is now banned. As such, this Lux guide is now not materially useful to anyone as a deck guide - but might still be of interest for people who want to learn about building combo decks. As such, I have made it completely public and free. Enjoy!
Baltimore Extra - Introduction
Free update! This guide was written right after I placed 31st at RQ Barcelona, but today (9/13) I also won the Baltimore Showdown with Lux - using the same exact list. I went 5-0 in the Trial on Friday to win a bye, then went 9-0 and ID'd my last two rounds to be 2nd in Swiss. Then I beat a Lucian in the quarterfinals, and after top 4 unanimously decided to split cash prizing, when there was only glory left to fight for, everyone else agreed that Lux should be the one to win the tournament to help get it banned.
I didn't lose a single match over the weekend, and only lost 2 games total in my 14 matches - one to Divine Judgment in game 2 out of Kennen (after which I won on point scoring to beat it being drawn in game 3), and one to LeBlanc's Windswept Hillock game 2 (which I'm completely fine losing because games 1 and 3 are very easy to win). I also had two opponents over the weekend who decided to concede the match after losing game 1 - my Azir opponent at 4-0 in the Friday Trial, and my Ornn opponent at 5-0 on Day 1.
There ended up being quite a lot of Twitter buzz over my run, as I have been pretty outspoken in my goal of getting this deck banned. I'm pretty happy to be personally done with the deck now that I have both my RC invites - I'm probably not playing it in LA over metal hunting (except maybe in the preregionals), and I have to assume they'll ban it before the RCs lmao.
Either way, I'm going to add some extra thoughts from my Baltimore run throughout this guide - always in these boxed inserts, labeled as "Baltimore Extras".
Today, I went 10-2-1 at RQ Barcelona with Lux, locking up top 64, and being the best-performing Lux deck in the room (though sadly this no longer translates to a metal card). It was my first RQ - though this certainly was not my first time playing a high-stakes card game tournament. I chose to bring Lux because I believed - and still do believe - that it is legitimately the strongest deck in the format, in a literal sense. It just gets so much equity from having some 100% matchups and a large number of 80-90% matchups, and its bad matchups (mostly Kennen and Rengar) aren't worse than 40% in theory, and often end up being even better than that as people just aren't currently prepared at all to beat the deck.

me jokingly joining in the Aspirant's Climb 'best of winners' picture, with the playmat instead of a metal card
Throughout the testing process for RQ Barcelona, I wrote a 10k-word-long guide to everything I know about Lux for the team I worked with, Aspirant's Climb, plus a few other friends. What follows is that guide, polished a little for public release, with a couple more sections added and expanded on.
I will be covering everything you need to know to understand the deck, to play the deck, and to do your best at beating the deck. From my list and its reasoning; to the loop and gameplay patterns; to sideboarding and matchups; to many, many small optimizations that are hugely important to maximizing the deck.
So let's jump in.
0 - Should You Play Lux?
Obviously, playing Lux worked out very well for me. I went 3-1 in the preregional, and the three people I helped with Lux went 3-1, 4-1, and 4-0 there as well. Then I went on to 10-2-1 my first RQ for top 64.
But, this does not mean that Lux is right for everyone. As I touched on above, I think that Lux is in some senses the "strongest" Riftbound deck right now. I would estimate its “Stockfish” winrate in the current metagame to be somewhere in the 70-80% range. This is to say - I believe that truly optimal players playing my Barcelona Lux list against the set of decks you would expect to see at a tournament would result in Lux winning 70-80% of its matches.
And of course, this seems extremely strong! Does that mean that everyone should just stop playing Riftbound and start playing Lux? Well… it's a little more complicated than that.
First of all, the best Riftbound players in the world have winrates around 85-90%. A large part of this is that Riftbound is a game that heavily rewards the stronger player. And while Lux isn’t trivial to play or to play against, the skillset it tests is an extremely different one, and one that is overall less rewarding of skill diffs. I would expect that a strong Lux player could improve that 70-80% number to something like 85% at a real tournament, but 90% might be a stretch.
Secondly, Lux has the unfortunate property of being a Proving Grounds legend, and thus no longer eligible for Best-Of Legend prizing outside of the RCs. Depending on what your goals are, that might be a dealbreaker for you. If you only care about winning the tournament, I think Lux is a strong choice; but it looks a lot worse if you’re considering overall monetary EV, especially if you also already have an RC invite.
Finally, this is just what my estimate is of how Lux fares against the metagame right now. This might just change. Lux is not widely played, partially because people don’t know how to play it well, and partially because it’s just extremely unfun. But that might change, especially with me releasing this guide.
So, should you play Lux? Maybe if the only thing you care about is winning, and also believe that you can play it on the upper end of its range and also that it isn’t being overly targeted at the moment. At least for me at RQ Barcelona, that answer landed on a definite yes.
Baltimore Extra - Meta Update
It did seem like the field got softer between Barcelona and Baltimore - I had a lot of opponents tell me they "just started cutting their Lux hate". I now think it would be pretty hard for Lux to be all that "targeted", as I kind of expect people to mostly react by just adding 1-2 hate cards and not actually playing the matchup, where understanding the matchup is actually very important.
My Baltimore win was very visible though, so maybe it'll inspire a lot more respect for LA. Either way, even when maximally respected I believe Lux to be strong to the tune of 65% - and I don't think 2 weeks is enough to get to maximal respect.
I should also add that, at this point, I do expect the deck to get banned. My best prediction for the timeline on that is around the release of Set 5 - roughly the same timing as the Pursuer/Climb/Arena's Greatest ban before Set 4. This would mean solidly after RQ LA, but before the RCs
1 - The Decklist
You can find my RQ Barcelona list here.
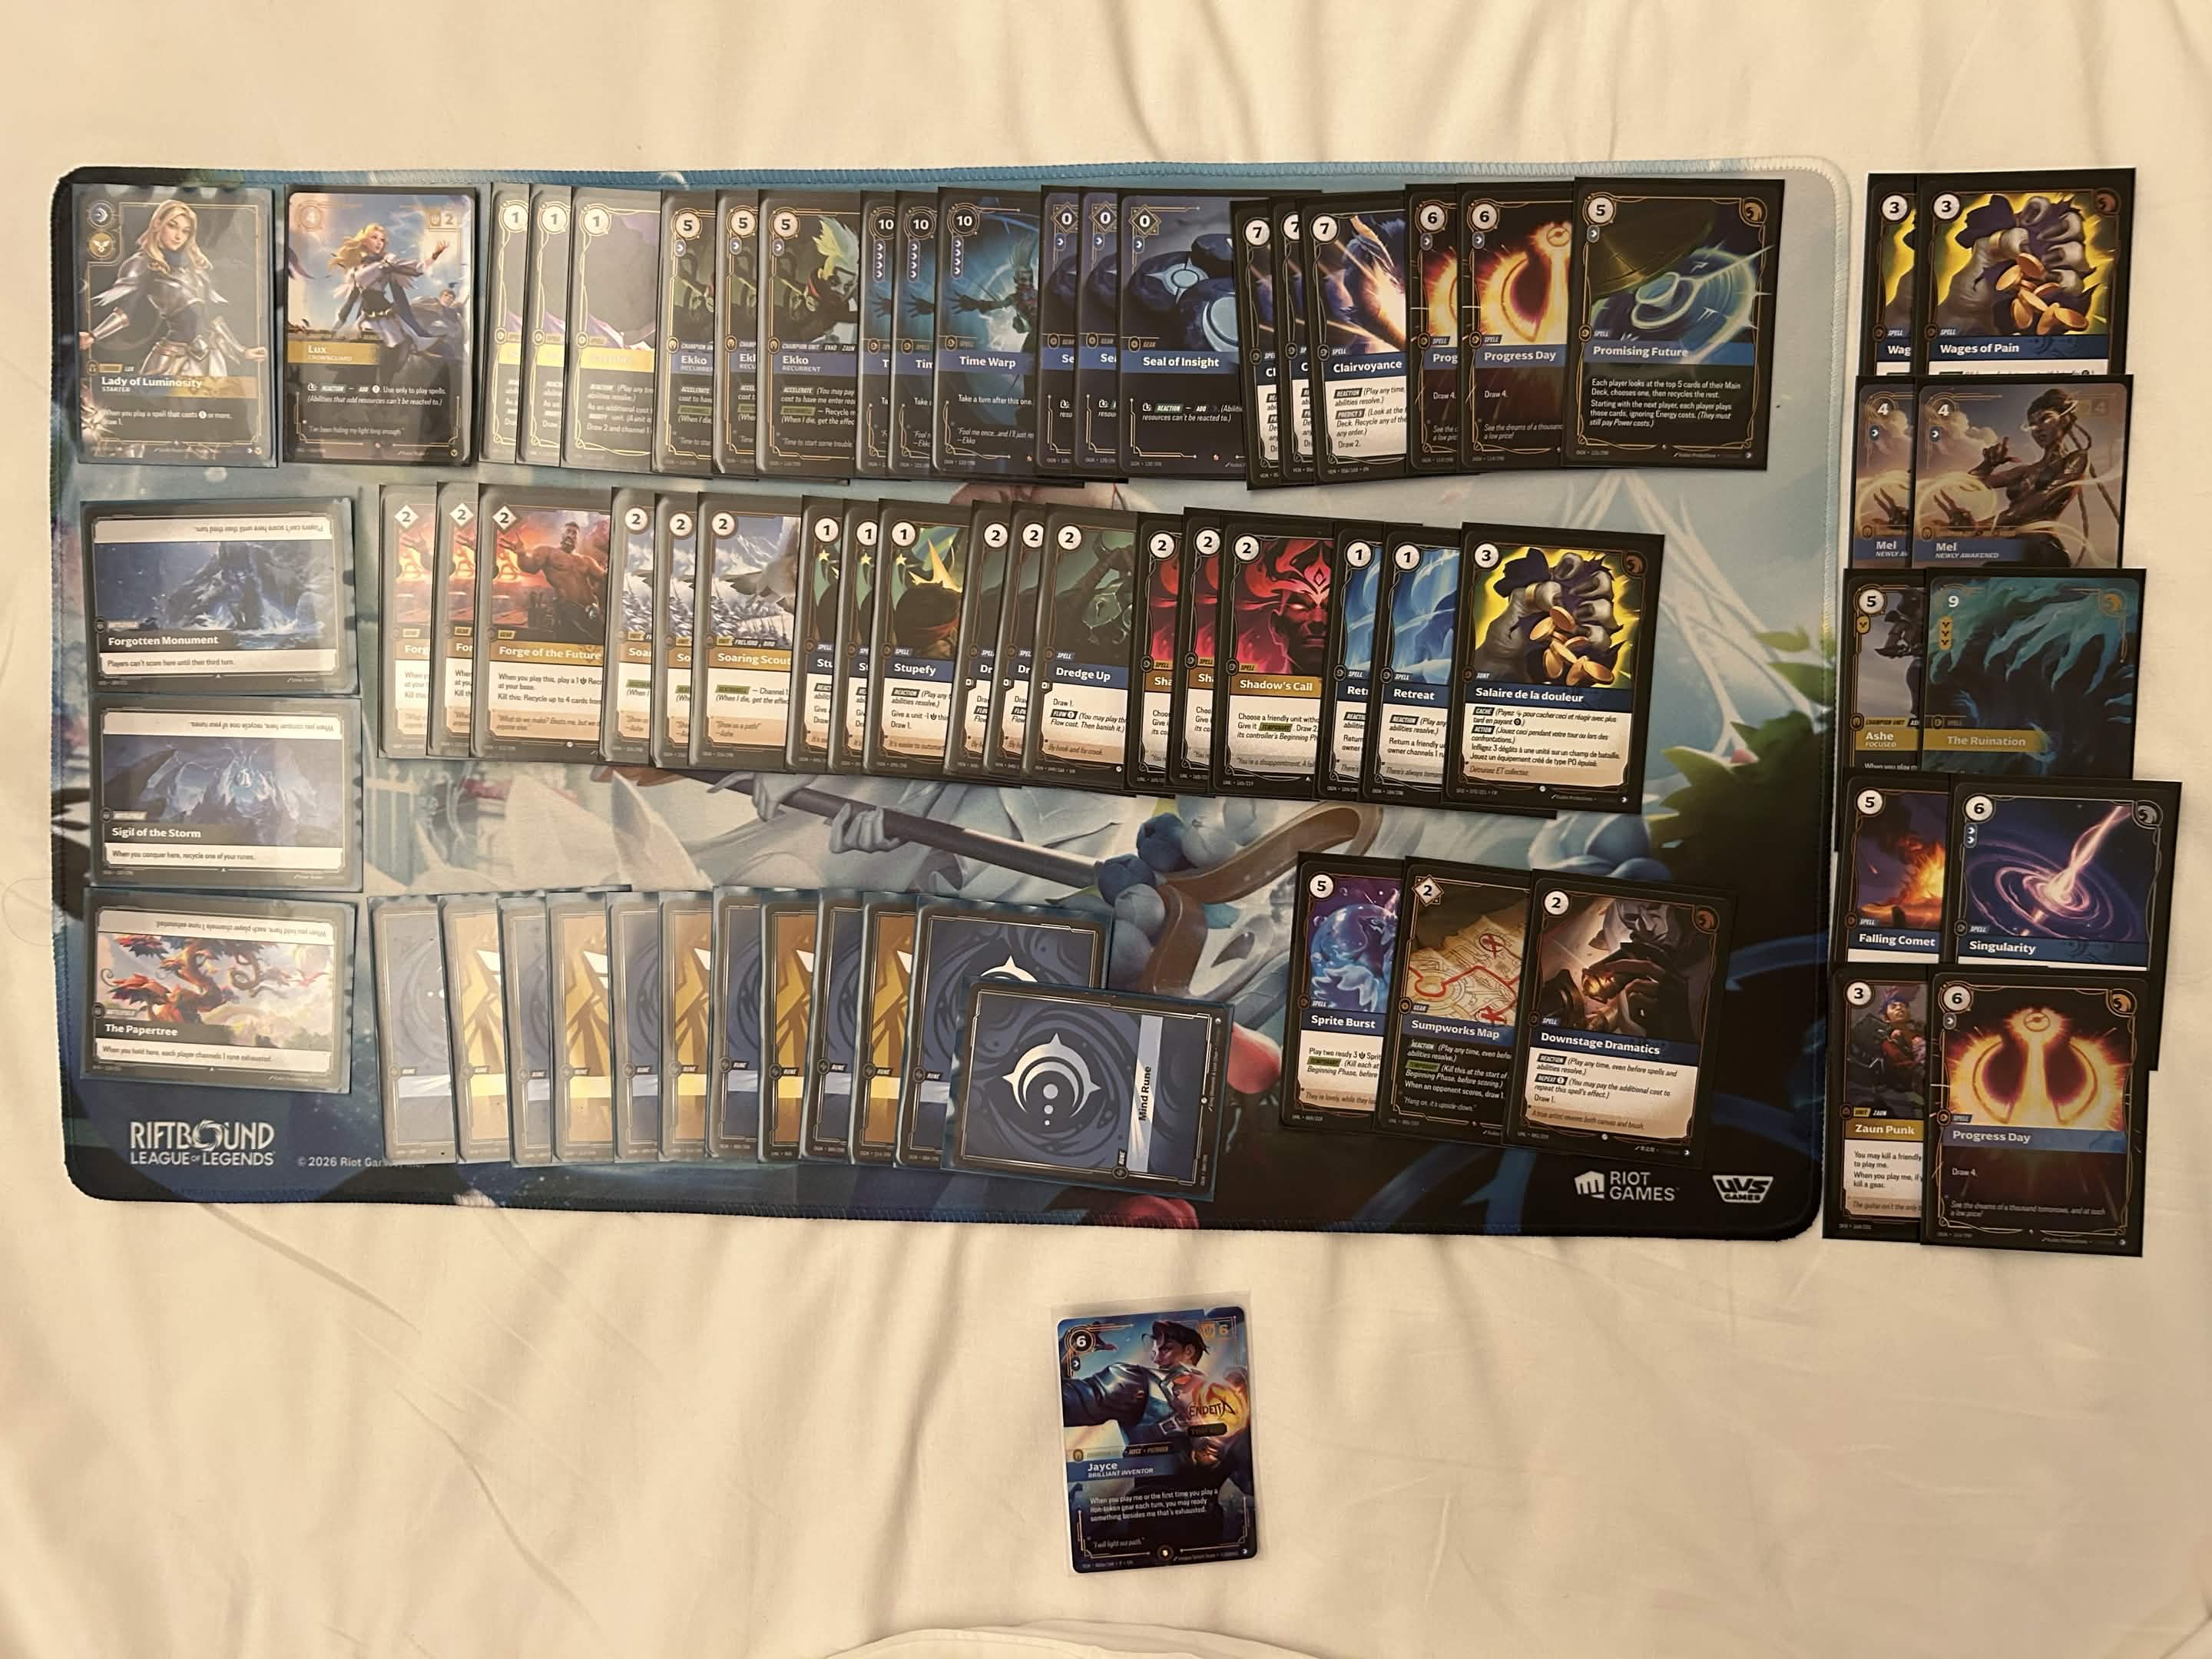
My RQ Barcelona 10-2-1 Lux list
I will go over the card choices naturally as I talk about how to play the deck. But first up, the most important, but least interesting part, that happens at the end of basically every game you win:
2 - Going Infinite
Once you empty your deck, you can start infinitely looping. Here are some of the simplest loops, written out explicitly:
2.1 - Infinite Energy
Always start with this one.
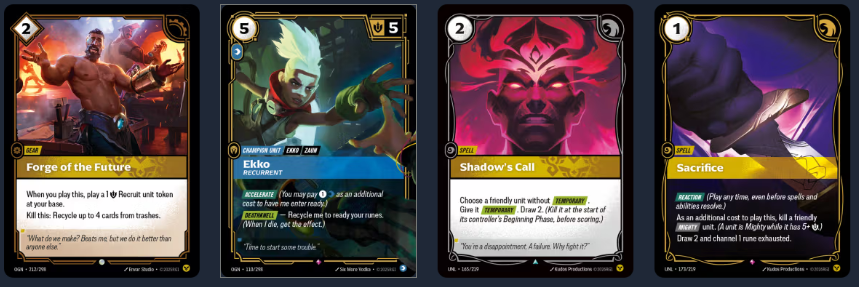
0) Start with an empty deck, at least 8 energy and 1 power left, at least 11 runes in play; and
Ekko, Sacrifice, Forge of the Future, and Shadow's Call in hand. (note that this means you can have 12 runes and no power - just recycle a rune). Also have a Shadow’s Call, a Sacrifice, and a Forge in your Trash.1) Play Forge (now you have 6 energy, 1 power). Use it to recycle Sacrifice, Shadow’s Call, and Forge.
2) Play Ekko (1 energy).
3) Play Sacrifice (0 energy -> 11 energy). You will put Ekko on the bottom, draw 2 of the 3 recycled cards, and channel a rune.
4) Play Shadow’s Call on the Recruit from Forge (9 energy). This draws the last card plus Ekko, returning to an empty deck.
5) Float a power with the channeled rune (9 energy, 1 power). We are back where we started but now have 1 extra energy. Repeat.
6) After you get to having 2 spare energy you can play the Call on Ekko before Sacrificing it instead of the Recruit, so the Recruits you are now making with Forge aren’t being made temporary.
There are many ways to get to this starting state (Forge, Call, Sacrifice, Ekko in hand, empty deck, 8 energy). If you are in a less cleanly matching state, I would recommend taking some actions to get to a clean starting state so that your loop explanation is as easy to understand as possible.
For example, if you don’t have Shadow’s Call in your hand, you can on the first iteration use some other card draw (two
Stupefies, flowing a Dredge Up, etc). This may cost you more energy on startup in some cases. That is almost certainly fine.As another example, if you already had a Forge in play, you only need 6 energy to start. Basically you can move step 1 to the end then.
This loop also can incidentally recycle your opponent’s entire discard, in the order of your choosing.
2.2 - Infinite Energy With 9 Runes
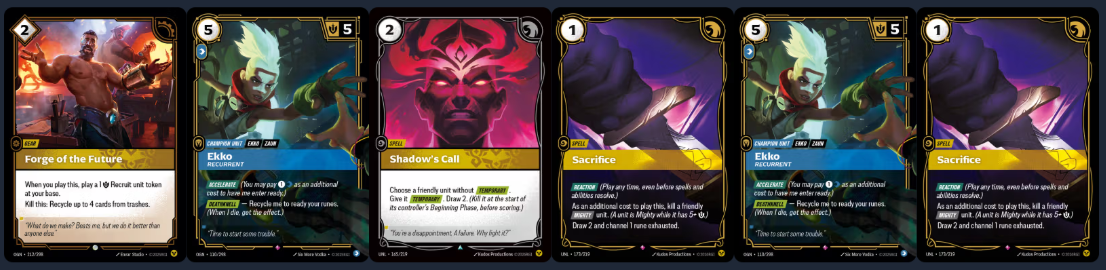
It is quite rare to get to a state of having an empty deck without having 11 runes in play or the ability to bootstrap up to 11 runes in play by recycling Retreat with Forges, but in case that happens, or if you're just too lazy to do the boostrapping, there is a different loop that works:
0) Start with an empty deck, at least 8 energy and 1 power left, at least 9 runes in play; two
Ekkos, Sacrifice, Shadow's Call, Forge of the Future in hand. Also have a Forge, two Sacrifices, and a Shadow’s Call in your Trash.1) Play Forge (6 energy, 1 power). Use it to recycle Forge, two Sacrifices, and a Shadow’s Call.
2) Play Ekko (1 energy).
3) Play Sacrifice (0 energy -> 9 energy). You will put Ekko on the bottom, draw 2 of the 4 recycled cards, and channel a rune.
4) Play Ekko using the channeled rune (4 energy). Play Shadow’s Call on Ekko (2 energy). You will draw the other 2 of the 4 recycled cards.
5) Play Sacrifice (1 -> 10 energy). You will put Ekko on the bottom, then redraw that Ekko plus the other one that was on the bottom, and channel a rune.
6) Float a power with the channeled rune (10 energy, 1 power). We are back where we started but now have 2 extra energy. Repeat.
If you only have 8 runes in play after playing Ekko, then this loop is energy- and power-neutral but does make a recruit every loop. If you are completely stuck with no Retreat to buyback and have 8 runes and a power, you can do this loop to play infinite recruits at base; sometimes that is enough to win, along with accelerating some ekkos at the end at the cost of resources.
If for some reason you don’t have a second Shadow’s Call, you can still run this loop, but it will be slightly nondeterministic, as you will need to have a branching point where you will need to either play a Sacrifice you recycled, or play the Shadow’s Call you recycled - and you are guaranteed to have drawn one of them, but not guaranteed to have drawn a specific one. This has been ruled by the head of the Judge Program to still be permissible as a shortcuttable loop.
Note that this loop also is a way to beat an unempowered
Helm of Suppression without removing it! If you have 10 runes in play, you will make 4 extra energy from the default version of this loop, while only spending 3 extra energy for Helm, so you net 1 each loop. 12 runes even beats two Helms, though I assume your opponent would just rather empower their first Helm.2.3 - Infinite Card Recursion
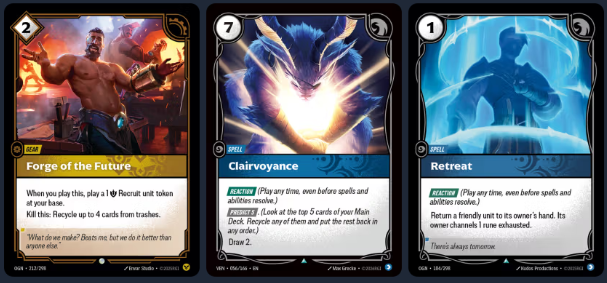
Once you have infinite energy and infinite non-temporary recruits, you can easily convert that into infinitely returning an arbitrary card to your hand with the following loop:
0) Start with
Clairvoyance and Forge of the Future in hand; Clairvoyance, Forge, and [CARD] in discard.1) Play Forge, use it to recycle Clairvoyance, Forge, and the [CARD] in your discard you want to return to your hand.
2) Play Clairvoyance to draw all 3 of those cards. (predicting 5 while you have 3 cards in your deck does NOT cause burnout)
3) You now are back where you started except you have [CARD] in your hand instead of your discard.
This loop can be used in conjunction with
Retreat to make infinite power; with Sprite Burst to make infinite sprites; with any removal spell to remove your opponent’s units; and with Ashe to banish your opponent’s hand.Note that if you are playing a spell that costs 5 or more, like Sprite Burst, you cannot do so with an empty deck. However there is a simple fix: you can pay Forge, use it on just one Forge, and then play your spell that costs 5 or more.
2.4 - Converting Infinite Into a Win
If you decide you want to be extremely safe, you can play
Renata Glasc, Mastermind and Jayce, Brilliant Inventor in order to then have an infinite point engine (simply put Renata on a battlefield after accelerating an Ekko to it, then repeatedly ready it by Retreating and replaying Jayce). The main use of this infinite point combo is to be able to win in extra turns. If you feel as though you cannot play quickly enough to avoid extra turns, then it is a crutch that might be worth having. But there are basically no cases where it makes a difference other than time.Simply put, most decks won’t be able to beat infinite Recruits at base, infinite Sprites on battlefields, and all their units on battlefields killed - even if you don’t touch their units at base! This is why I play only Wages and Sprite Burst in the maindeck, instead of bothering with
Deadly Flourish or The Ruination or Ashe or Renata.Without the infinite point engine, you do need to pass some turns. You can theoretically Time Warp to turbo out points, but you should just be safe to pass the turn - as you can end your combo turn after making infinite resources by prepping yourself to be able to combo again immediately on the next turn. Remember that you need to recycle some cards into your deck in order to not burnout when you draw for your next turn! And remember that you might want to recycle several cards in order to play around things like
Hidden Blade or Invert Timelines forcing you to draw cards. I usually go for 6, but you can get to 9 or 10 by recycling maximally on two Forges and then killing your own Ekkos.For a little bit more safety postboard, you have access to the ability to kill all of your opponent's units with The Ruination; and the ability to banish their hand with Ashe. The main utility of those two cards is really for their more fair uses - Ashe being good at taking an Abandon out of your opponent's hand on your combo turn, and Ruination sometimes being a good way to buy one or more turns by setting your opponent back on units. But they can also function to protect you from weird ways your opponent could theoretically beat infinite might - things like
Divine Judgment, or Downwell plus cantripping into Nocturne plus Ride the Wind, or burning you out with triple Invert.3 - Actually Drawing Your Deck
Before Clairvoyance was printed, and especially before Relivia put Time Warp into the deck, I would’ve described the Lux deck as trying to draw itself very “fairly”. You were just converting all of your energy into card draw, and didn’t really care that much what order you did so in. The deck was more about maximizing your resources, figuring out how to squeeze extra energy out of channeling extra runes or being more efficient.
However, in my experience now the deck is much less about the small efficiency edges, and much more about setting up big resource gains with Time Warp and Ekko+Sacrifice.
3.1 - The Pieces of the Puzzle: SETS
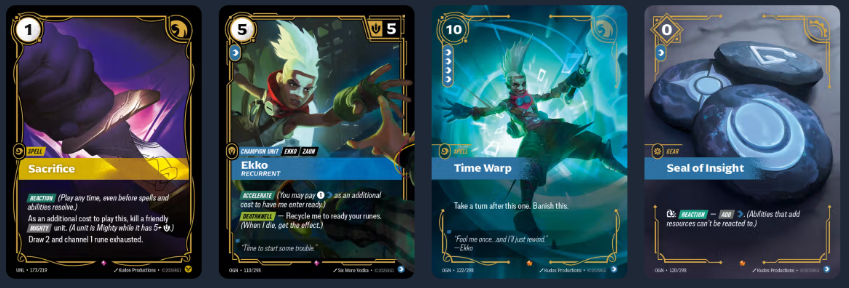
There are four cards that you are mainly try to set up now to accelerate your combo the most:
Ekko, Sacrifice, Time Warp, and Seals. Throughout this document I’m going to refer to these four cards as "SETS" (Sacrifice, Ekko, Time Warp, Seal).Ekko + Sacrifice is obvious. This is your way to get big bursts of energy. At its best, playing Ekko + Sacrifice will cost you 6 energy and 1 power, give you back 12 energy and 1 rune, draw 2 cards, and put Ekko back into your deck. This represents a net effect of +6 energy and +1 card deeper into your deck. However, one downside is that this effect scales based on how many runes you have in play - without an extra source of power, there isn’t even a way to naturally untap 12 runes with Ekko + Sacrifice! As if you’re just channeling up to 12 normally and don’t have a Seal or a Gold, you would have to pay 1 rune in order to play Ekko, so you would only have 11 in play when Ekko’s trigger goes on the chain (you would get the 12th back from Sacrifice, but that happens after your Ekko trigger resolves).
So, generally you want to try to use your Ekko + Sacrifice pairs when you have as many runes in play as possible. This includes going out of your way to put more runes into play right before you’re resolving an Ekko trigger - with things like getting your own Soaring Scout killed, or playing Retreat. Even if it costs energy - like in the case of Retreat - it will often be worth it as you will make back some of that energy immediately.
Note that if you have 12 runes in play AFTER you play Ekko, due to having that extra source of power, you should always float an energy and a power with a rune between Ekko's trigger resolving and Sacrifice resolving. That way, you can maximize Ekko's trigger untapping 12 runes, while still getting the rune that Sacrifice channels.
Time Warp + Seal is the other important piece that now lets Lux absolutely tear through its deck. At its base, Time Warp doesn’t look that good with the combo - it’s expensive, and costing 4 power means that even with the 2 channeled runes from your extra turn you’re going down 2 runes to play it. This sounds counterproductive to Ekko, who wants you to have more runes in play. It does draw 2 cards (one from Lux’s legend, one from drawing for turn) for roughly 0 energy cost (you will probably get at least 10 energy from your runes on your extra turn) - but it doesn’t look that appealing if you imagine it actually costs 0 energy and 2 power to draw 2 cards.
However, the main benefit of Time Warp is that it also lets you ready everything else as well. If you have Lux and two Seals in play, suddenly your Time Warp is making 2 more energy and 2 more power - so now we’re looking at a card that gives +2 energy, +2 cards, at no cost!
Before Vendetta, this was a powerful but somewhat inconsistent line that the deck could take advantage of. It’s extremely strong if you draw 2 Seals, but even when you’re spending all of your energy drawing cards, it’s just not that easy to guarantee that you draw 2 Seals.
Now though,
Clairvoyance is our best friend. It’s technically a little under-rate in terms of the number of raw cards it draws - the “base rate” for card draw is 2 energy for 1 card (see Dredge Up), and Clairvoyance costs 7 energy for 3, which is 1 energy more than that base rate. But in exchange it digs so deep for your SETS that assembling everything becomes extremely consistent.Because of how much this deck now wants to assemble its A+B combos, you should generally try to avoid as much as possible putting any of SETS to the bottom in your mulligan - outside of one Time Warp. This isn’t a strict rule, as sometimes you do want to guarantee that you have things to do early. But it’s just so important for comboing to see as many copies as possible of these 4 cards that it’s pretty close to correct to never mulligan them.
3.2 - Sacrifices #4-6
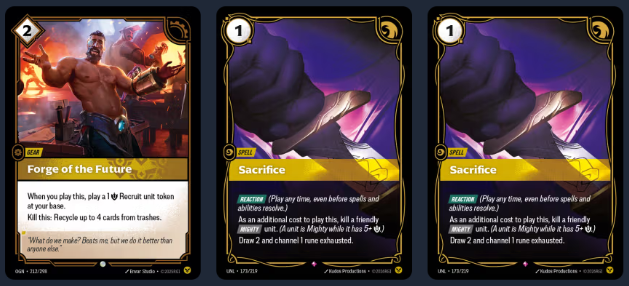
The other thing that Clairvoyance enables is consistently being able to play the 4th through 6th copy of Sacrifice productively.
Now, obviously we can only have 3 physical copies of Sacrifice in our deck. But we can also recycle those copies of Sacrifice with our Forges after playing them, putting them back in our deck, so we can redraw them and play them again. This is what I mean when I say "4th through 6th copies".
This has one obvious problem - if our goal is to draw our entire deck, putting cards on the bottom of our deck can’t really help, because in order to get to them we would have to have already accomplished our goal of drawing our entire deck.
But Clairvoyance and
Promising Future let you cheat this dynamic by putting cards below those Sacrifices. If you activate Forge recycling some Sacrifices, then predict 5 cards to the bottom with Clairvoyance, then your Clairvoyance has effectively gotten you 8 cards closer to those Sacrifices! And since redrawing those Sacrifices (plus the Ekkos that went to the bottom of your deck when you first Sacrificed them) will usually give you more than enough resources to draw through the 5 cards you predicted to the bottom, this is almost identical in effect to Clairvoyance just straight up drawing 8 cards. 7 energy to draw 3 is a little below rate - but 7 to draw 8 is way above rate.My rule of thumb is that I find it useful to use a Forge to recycle Sacrifices as soon as I have two copies. As long as you aren’t putting more cards to the bottom of your deck you can wait, but it can be meaningfully worse to resolve a third Ekko + Sacrifice before putting three Sacrifices to the bottom instead of just putting two to the bottom first - you're recycling one more Sacrifice, but at the cost of them all being 1 card deeper. And again, the limiter is generally how fast you can get to your 4th Sacrifice, and past that you should draw the rest pretty easily.
You can even choose to use Forge on a single copy of Sacrifice sometimes, but I would only do this if you have another Forge lined up before your next Clairvoyance. You probably don’t want to end up with 6+ cards between your fourth Sacrifice and your fifth; that probably isn’t worth having your fourth Sacrifice being one card further up.
This dynamic is legitimately another huge gain for the efficiency and consistency of the Lux deck. Clairvoyance was a way bigger power boost than anything I possibly could have imagined from Vendetta; and as far as I understand it, many people didn't even realize this.
3.3 - Promising Future

The final piece of acceleration through the deck is the singular copy of Promising Future. For a long time I had cut the card because it can be risky, allowing your opponent to Ride the Wind to victory - but its ability to turbo out the end of your combo is too strong not to play.
Basically the ONLY time you should ever play Promising Future is when you have a recycled Ekko that you know the position of in your next 5 cards, and a recycled Sacrifice somewhere below that. It can be tempting to try to spike a Clairvoyance or Time Warp with an earlier Promising Future, but the ability to miss is way too high to be worth it outside of desperate situations when you haven’t gotten near the bottom of your deck, and you give the opponent the ability to find annoying cards like
Ride the Wind off of it.However, when you do play Promising Future in this window, you will have cycled through 6 cards for the cost of basically just 1 power! Since you were going to play that Ekko eventually anyways, the energy cost of Promising Future is basically free, and it gets you a full 6 cards closer to the Ekko that you play and the Sacrifices beneath it.
I will stress again, though, that Promising Future can be risky, even if your cards are deterministic, and isn’t always necessary. If your opponent has action-speed movement like Ride the Wind, Promising Future can theoretically let them play a movement spell off the top that they otherwise did not have access to, which would them give them an Action window they would not otherwise have access to, letting them play a second movement spell from hand, scoring to victory. Postboard there are also a couple annoying sideboard hate cards they could spin into - specifically Divine Judgment or Helm of Suppression. So, against purple, Rengar, Lucian, Divine Judgment, and Helm of Suppression, be careful in evaluating if you actually need to play Promising Future.
Baltimore Extra - Promising Future's Promising Future
I've gotten a little higher on Promising Future as it keeps getting me out of low-resource situations. It's definitely still only a 1-of, because the card still only has one spot it can be played; but it's just been extremely rare that my purple opponents ever even threaten to double Ride the Wind off of it, so I've probably been overrating how risky it is.
3.4 - Common Play Patterns
There are generally 3 phases of gameplay when you’re playing Lux:
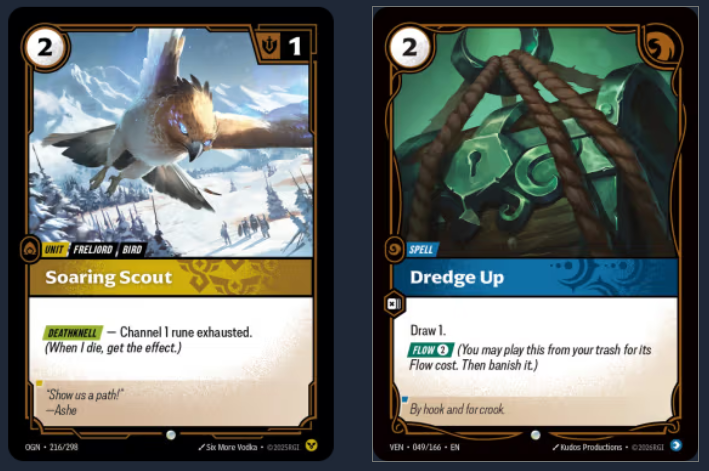
Early development - generally before you have the ability to play Clairvoyance, where your goal is to just spend your energy developing resources.
The strongest play on these turns is
Soaring Scout, as it both lets you get on board early which can be nice for annoying 0-1 might units like Crabs or Steel Paws, and also develops an extra rune, which is both better early and good for comboing.It is generally good, but not absolutely critical, to spend all your energy in these early turns on productive plays. We already talked about Scout; Cycling
Dredge Up or Stupefy or Sumpworks Map is quite nice; and playing out Forge of the Future can also be worth something as you will definitely want to play at least one Forge at some point, whether that is for the Clairvoyance-for-Sacrifices-4-to-6 trick, or just for the ending combo. Forges and Scouts can also just serve as expendable units that you can play Shadow’s Call on later.Finally, one common play you always have access to in early development is deploying Lux from your Champion Zone. Whether or not that is a good idea varies from matchup to matchup - if it lives, it can make enough energy to pay for itself (just 2 turns in play breaks even!), while unlocking more expensive spells. But if it immediately dies you kind of end up spending 4 energy for no effect, while losing access to having your Lux for Time Warp turns.
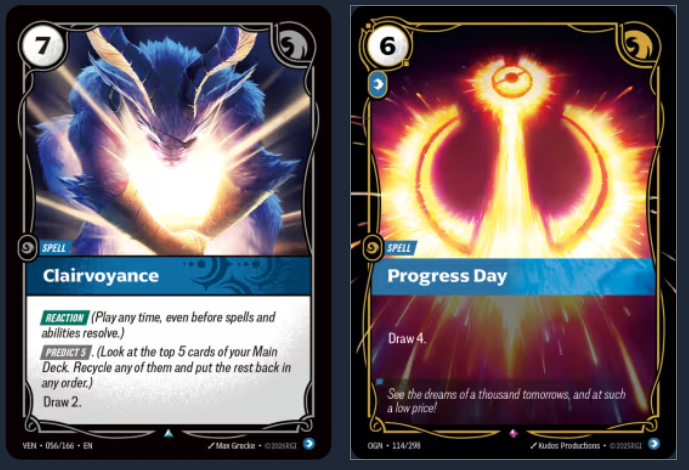
Midgame dig - ideally, the midgame will involve you playing
Clairvoyance and Progress Day, to dig for the SETS to burst through your deck. Ideally, you will be able to transition to this phase as soon as you have 6 or 7 runes - but sometimes you won’t have a Clairvoyance or Progress Day. In those cases, you might stay in the early development stage longer than ideal, but it can definitely be fine if the reason you don’t have Clairvoyance is that your hand is full to the brim with SETS.Of the two card draw spells, Clairvoyance is distinctly stronger, as it both digs further and doesn’t cost power, which is a very important resource - but the power cost of Progress Day isn’t a big deal as long as you are using a Seal to pay for it, as you will want to play Seals eventually anyways.
That said, you should really avoid playing Progress Day without a Seal to pay for it if possible - as that power will cost you a lot of energy since you’re readying all your runes many times with Ekko triggers and Time Warp extra turns. A bit of math makes it pretty clear how costly it is - going down a rune on turn 3 will cost you 1 energy on turn 4 and turn 5, 1 energy each time you play a Time Warp, and 1 energy each time you resolve an Ekko trigger. That adds up to 8 energy on top of the 6 you’re already paying for a total of 14, plus you also have to recoup the actual rune you lost.
But this is also definitely not something that you can always avoid doing. If you have a large amount of extra resources (like from Papertree), or if your opponent isn’t interacting with you at all, then you might be fine going down that one rune. Sometimes you need to play the Progress Day to play around it getting Sabotaged; and sometimes you just don't have other good ways to spend your energy.
This phase can last for as long as your opponent isn’t threatening to win. Typically that means you can’t let your opponent get a 6th turn, but if they’re being slow at scoring, you can also afford to spend more time digging, before moving on to…
Endgame combo turn - this is where it all comes to a head. In most games, you will avoid playing any Ekko + Sacrifices or any Time Warps until it comes to the final combo turn - this is because both of those plays get better the longer you wait; Ekko because you want to maximize the number of runes you have in play when Ekko triggers, and Time Warp because you want to wait until you have Seals in play to play it.
However, it is possible sometimes to fire off smaller burst turns before your final combo turn - this will mostly happen if you don’t have any other way of spending your energy, or for the purpose of playing around some specific sideboard cards. For instance, if you have two Seals in play and 10 energy, it can be pretty nice to just fire off a Time Warp whenever your purple opponent doesn't have 2 runes up representing Abandon.
The typical pattern, though, is to wait until you either feel like you have enough resources, or you are forced to as your opponent is going to win the next turn, and then start bursting through your deck.
You will often start by playing Ekko + Sacrifice, then maybe playing some card draw, then playing Time Warp. If you have Lux available to play and expect to be able to Time Warp again immediately, it’s generally quite good to play Lux during your first Time Warp - though you don’t always have the luxury.
You should generally try to dig for as many Seals as possible to put into play before you play Time Warp, so that you can use the Seals to help pay for that Time Warp - a common thing to do is to play Ekko Sacrifice from 12 runes, which gets you to 17 energy, which is enough to then play Clairvoyance, looking for more of each of Ekko, Sacrifice, Seals, and Time Warps; as well as a Time Warp.
One important note on Seals: you can definitely combo off without having any seals in play before your combo turn, playing 2-3 right before your first Time Warp. Doing this has the benefit of playing around gear hate. However, if you have 2-3 seals in hand on the turn before your combo turn, it does legitimately help to play them all that turn - that way you will have all of your seals ready on your combo turn, instead of just 1 seal. Just be cognizant of whether you think you’ll need that help, or whether it’s better to play around gear hate (and sometimes you can even play the seals while protecting them from Acceptable Losses by just having another gear!).
Generally the deck is strong enough and you have few enough choices that it’s fine to just vibe out whether you feel that you can combo. A good benchmark is that if you have at least one of each of Ekko + Sacrifice + Time Warp, and either two Seals or one Seal plus ways to dig for a second Seal, you should be fine. If you're deep enough in your deck already, it's pretty likely you don't even need the Seals and Time Warps.
However, if you want to go a bit deeper... I will cover more about how to tell if you can combo at the end of this document.
3.5 - Goldfishing Metrics
I currently believe that, in goldfishing (assuming your opponent doesn’t ever do anything but constantly has units at battlefields so you can always kill your own Soaring Scout), you should be able to win:
- With 100% consistency by turn 6 going first
- With 100% consistency by turn 5 going second
- With 70% consistency by turn 5 going first
- With 10% consistency by turn 4 going second
Try some goldfishing! If you don’t feel like you’re hitting these numbers, you’re probably doing something wrong. Much of the skills involved in playing the deck and decisions that come up while playing the deck stem from extensions and variations on what goes into goldfishing - so being very familiar with how to goldfish is actually quite important! The rest of this document will largely be written with the assumption that you are familiar with what goldfishing feels like - so if you haven't gotten comfortable with it, consider doing so before reading on.
Obviously, these numbers are kind of absurdly high. The first two imply that the deck should never lose if the opponent doesn’t interact and doesn’t break scoring patterns; and the third implies you can even beat an opponent scoring fast if you’re going first.
This is a little deceptive, in that most opponents have some form of interaction that can kill Lux when you play it. But even if you assume they in fact kill Lux every time (but never do anything else), then you probably only drop to around 100 / 95 / 60 / 5. Which is still very good!
This is the biggest strengths of the deck. I only lost two game 1s at RQ Barcelona - once to Kennen having a maindeck Abandon as well as interaction for Lux; and once to a Time Warp Mel deck that was able to double time warp to kill me before my 5th And a lot of interaction, as I’ll cover in a below section, doesn’t actually do all that much to hurt you.
3.6 - Goldfishing Video
I recorded a video that demonstrates what goldfishing usually looks like. It mostly goes over everything in the “The Goal” and “Actually Drawing Your Deck” sections. You can find that here.
Note that this is a slightly outdated list, as it does not have the Promising Future.
4 - How to Beat Interaction
One of the degenerate properties of the Lux deck is in how it narrows down what matters in a game to a very small set of things. So let’s talk about the cards that matter.
4.1 - Acceleration
Not quite interaction, but one way that someone can attempt to beat you is simply by being faster.
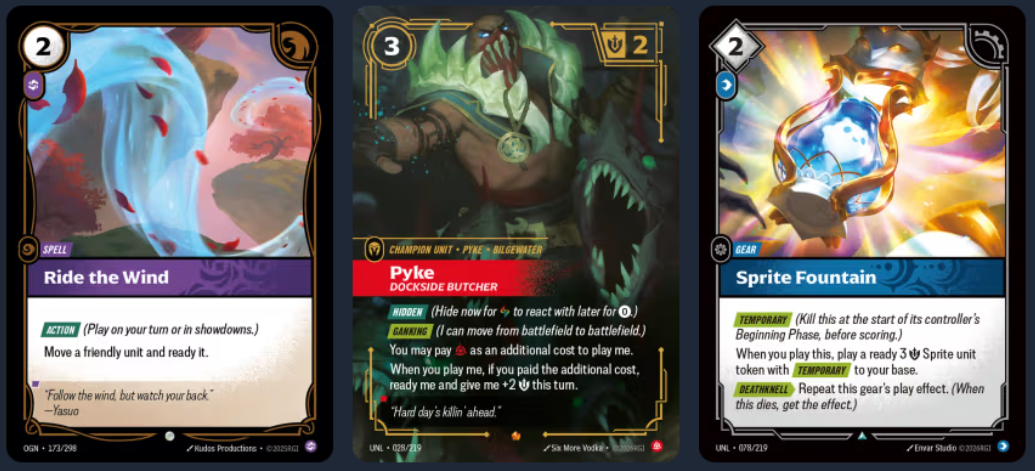
The main way an opponent can do this is by scoring 2 points on turn 2 with an accelerate unit. Our recourse against this is very naturally to play Forgotten Monument in game 1, and side into 3 copies of
Wages of Pain postboard. This generally works pretty well, especially in combination with our ability to win a turn early sometimes - turn 5 going first.The nice part about Wages of Pain is that it's often just a good exchange to turn 3 energy in the early game into a Gold, even ignoring the fact that you are likely denying your opponent points. So even if they play tricks or similar to get around it, it's still very good to play early in the game. Also keep in mind that you can combine it with Stupefy in order to take down a 4 might unit.
4.2 - Extra Points
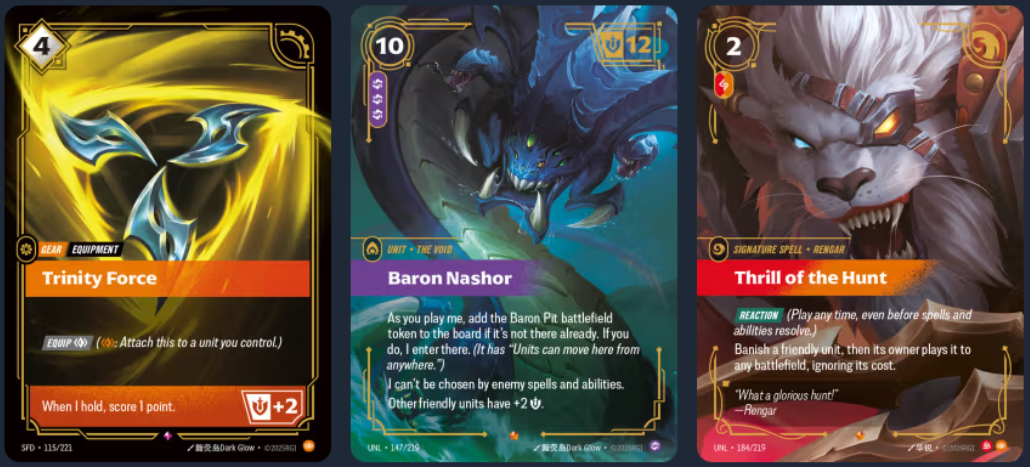
There are a few other ways of cheating points. If they score on your turn, that can let them break the normal scoring pattern - because of this, you should roughly avoid ever giving purple players Action windows for
Ride the Wind. Thankfully this is mostly avoidable, as you usually do not need to give them an Action window - the only exception against Rengar, who has Reaction-speed movement in Thrill of the Hunt. Unfortunately you do not have much recourse against that - but still not none! I'll elaborate later when talking about Rengar.Trinity Force, Nasus, and Ahri are a few ways of directly scoring extra points. You can side in unit removal against Ahri and gear hate against Triforce. But also you can just try to fight some of their early scoring with Wages and such - if you slow them down to being 1 point behind normal scoring patterns, while that doesn’t matter normally, that negates 1 cheated point, which is generally what these tools will do.
Time Warp and
Baron Nashor also technically represent ways of scoring extra points. Of the two, Time Warp is a lot scarier by far, as it scores 2 extra instead of 1, and can theoretically be chained. They are both quite hard to interact with, but are both kind of awkward in that they cost 10 energy to play. And since you aren’t planning on ever giving your opponent a 6th turn, this means that in order to utilize them your opponent needs to be careful not to spend much power at all, which isn’t always trivial.4.3 - Hard Bargain

Playing around this is quite simple. If you think your opponent has it, try to have as much energy left on your most important spells (mostly Time Warp on combo turns) as they have up to pay for Hard Bargains. Even against two Hard Bargains held up to tax you 8 energy, you can still sometimes push through all your Time Warps by using an Ekko+Sacrifice first. On 12 runes plus a power floating, Ekko + Sacrifice naturally takes you to 18 energy and a power - which is notably enough to play Time Warp with 8 left. You can then play Lux to make taxing future Warps even harder. If they spend Hard Bargains there just to tax you, then you don’t get to play more things that turn but do get to not worry about any interaction for the rest of your combo turn. And if you just keep lining up Ekko + Sacrifice + Time Warp in that way, you can let yourself never be exposed.
Generally you don’t really make sideboard decisions against Hard Bargain. Simply be efficient, and it will mostly work out.
4.4 - Defy

Defy is a weird one, in that it is very cheap and many decks play it, but its impact is quite minimal. The best it can do is counter a Sacrifice, which represents putting you down 2 cards and 1 power. But you still get the Ekko trigger, so you can often just play through it. One Defy does basically nothing, two Defies starts being annoying, and three Defies mostly just won't happen, and still can be beaten pretty easily.
Note that the main axis in which Defy attacks you is on runes, so in Defy matchups you should try to prioritize having a healthy rune count - be less willing to play Progress Day early, prioritize Retreat and getting Scout triggers more, etc.
Again, not many sideboard decisions hinge on this. Maybe be more willing to leave in the second Retreat, as that can help repair situations where you are low on runes because your Sacrifices keep getting Defied. Maybe be more willing to side in
Mel if they also might have other counterspells; but using Mel just to beat Defy isn't generally worth it, as it's hard for even two Defies to tax you more than 7 energy 1 power.4.5 - Sabotage and Decree of Strength

These two cards are mostly the same. They can sometimes mess you up if they take your only ways in hand to spend your energy, especially in developmental turns; or if they manage to snag several copies of Sacrifice or Ekko - but the latter happens very rarely, so you should often be more worried about the former. And the cards taken are only recycled - you can still get back to them at the end of your combo turn.
Remember to track the order in which these effects recycle your cards.
The main ways to play and sideboard around these cards is to be more vigilant about having access to ways to spend your energy on card draw during the early development / midgame digging stages. Against Sabotage/Decree decks you should generally keep more Maps and Dredge Ups in your opening hands, while being a little more hesitant to fully keep opening hands that are flooded with SETS. Fighting these cards is the main purpose of the third copy of
Progress Day in the sideboard - as soon as you resolve a big card draw spell, Sabotage and Decree become a lot less effective against you.4.6 - Ashe, Focused

Ashe is like Sabotage and Decree, but both a little worse and a little better for you.
The way in which it is worse for you is mostly in that it banishes the card - so if it hits a Sacrifice, you might just be operating on only 2 Sacrifices in your deck total.
But the way in which it is better for you is that you can in fact often take advantage of the “get the card back when you hold” text, specifically because of Time Warp. You only need to clear one battlefield, get any non-temporary unit on it, and then play Time Warp in order to get your card back. And this can happen reasonably often as your opponent is less likely to have many units in play postboard, and might avoid being on battlefields to avoid free Scout and Papertree triggers.
4.7 - Abandon

Probably the scariest card to face, as it can counter Time Warp fairly unconditionally. Wind Wall and other counterspells that are unconditional also fall into this category, but see less play. You have four main ways of playing around these:
First of all, you can attempt to simply be a turn faster than they’re prepared for. After all, if they Abandon a Time Warp, all that does is buy them an additional turn. And obviously that is very good, but if you were setup to win a turn early and they aren’t immediately threatening to win, then that extra turn might not matter. Obviously this could let them draw into more interaction - worst case a second Abandon, or a card like Invert or Divine Judgment that buys them yet another turn - and so this isn’t a perfect plan, but sometimes gives you a meaningful out.
Secondly, you can use
Mel. This is fairly expensive at costing 7 and a power, and doesn’t work if they have a Star-Crossed they can also play. But as an added benefit it also lets you skirt around any number of counterspells, including Hard Bargains that are often also present in decks that have Abandon in the sideboard. The common play pattern would be to Ekko + Sacrifice to get to 17 energy, then Mel, empower, and Time Warp. If you have Lux in play and 12 runes to start you can even start with Mel + Empower, then play Ekko, and then play Sacrifice using Lux's energy in order to make even your Sacrifice uncounterable.There are also some lines where you put Mel into play a little earlier, before, in order to make it easier to afford all of this on your combo turn. This can also save a power, crucially, if you are using a Seal to do this that you otherwise would not be able to use on that turn. Of course, it makes the Mel vulnerable to unit interaction, so isn’t always good to do, but decks only have so many ways to remove backline units and you will often be presenting a juicy Lux to remove.
Third, against a single Abandon, you can play Ashe to banish it from their hand right before playing your important spell. This has the benefit of costing less energy than Mel and not being vulnerable to Star-Crossed, but the downside of not being able to blank multiple counterspells at the same time.
Finally, against a single Abandon, you can try to win by threatening to win without Time Warp, while having 10 energy at all points to let you switch to playing Time Warp if your opponent decides to go for playing their Abandon. This is somewhat difficult, but is definitely achievable - you will generally want to have fewer than 20 cards in your deck to attempt this. For the math on this, see the unhinged math section.
Note that opponents can use Abandon earlier than your Time Warps to counter your setup Clairvoyances too. That can also be somewhat rough, and is often correct for them to do. You don’t really have counterplay to that except to try to play through it - thankfully that is sometimes possible.
4.8 - Crumbling Sands

This card looks kind of like Abandon if you squint, but it’s a lot less scary because you can often simply play your big spell as your first spell of the turn. If you suspect your opponent might have this, you can sometimes try to setup spots where you Time Warp with two Seals in play three turns in a row without playing anything before the Time Warps, just to get them out of the way, and then follow that up by going off with Ekkos and Sacrifices.
Mel is a lot better against Crumbling Sands, both because it is a lot more limited in what it can counter (it can’t hit setup Clairvoyances, mainly), and because green does not get a card like Star-Crossed that can blow out a Mel.
4.9 - Invert Timelines

Invert Timelines is weird because it can mess you up a lot by discarding all your most important combo pieces, but it also helps you by drawing you 4 extra cards. Because of this, the scariest time for it to hit is when your opponent is threatening to win the next turn, so if your 5 cards can’t immediately combo off you just die. Any earlier turn and you can probably spend your post-Invert turn just setting up to combo later.
This makes one of the best ways to beat Invert Timelines simply going faster. If you’re prepared to combo one turn early, when they’re still on 5 or fewer points, then Invert never really has a window to do anything to you.
Another thing you can do to protect against Invert is simply to play your most important cards - SETS - more proactively. Put Seals into play, and use Ekko+Sacrifice or Time Warp as soon as they become reasonable, instead of waiting for your last turn. Usually waiting can be beneficial as they become better the more runes you have in play, but getting them out of the way can be nice into Invert, to an extent.
4.10 - Divine Judgment

The best card against you in that if it resolves it becomes extremely hard to win. However, most decks that play it (excluding Kennen) don’t have that many ways to actually find it, and “they don’t draw it” is a very real out.
Like Invert Timelines, you can sometimes beat it by just going faster, but it’s a lot harder because they can still reasonably play it on 5 points and expect to win. But still, going faster just gives them one fewer turn with which to find it, and so is useful.
There is however a way you can still sometimes cheese a victory against a resolved Divine Judgment: by turning into a controlling deck post-Invert for long enough to build back to your combo.
The way to pull this off is very narrow: you will generally want to put Lux and two Seals into play - and hopefully another unit too - the turn before they might play Divine Judgment. Then if they do play the card, they will likely go down to two units in play; meanwhile you keep Lux, a unit, two Seals, and will be going to 4 runes in play on your turn. If one of the cards you kept was
Singularity, you can play it without needing to spend any runes on your turn to kill both of your opponent’s units - hopefully this will be enough to set them back at least a turn. The next turn you can then play more removal, or accelerate an Ekko onto a battlefield to attempt to hold it. If it’s your Papertree game, you might even get some extra runes out of these few turns. And sometimes, if you go through all of this effort, you can manage to make it to enough resources to either run them out of threats for a bit, or assemble your combo.The chance that this works is still fairly small. A lot of things can go wrong. For example, it’s quite hard for this to work against Viktor, who can easily make a Recruit after playing Divine Judgment to have 3 units in play. If the opponent has a unit that makes another unit on Deathknell that can also be very annoying. And of course you need to line up this very exact sequence of Lux + 2 Seals + Singularity + Ekko. But it’s better than nothing, and I have legitimately won in testing with this plan (and gotten close several times)!
And against most decks playing Divine Judgment, the cost of putting control cards like Singularity and
Falling Comet in your deck is fairly low, as they are unlikely to also have other interaction - so it doesn’t actually hurt your goldfishing chances that much. Plus, you can just sometimes play a fair controlling game anyways. So all in all I think it’s a worthwhile use of two sideboard slots.Baltimore Extra - Beating Divine Judgment
I now have a live tournament example of how to beat Divine Judgment! In Baltimore in round 2, I faced off against a Kennen opponent, easily won game 1, and then lost game 2 to a Divine Judgment (I hadn't brought in my anti-DJ cards because I don't expect most Kennens to have it usually). However, in game 3, with me going first on Papertree:
Turn 1 I play Dredge Up. They play Merchant.
Turn 2 I pass with 4 runes up. They walk Merchant in, I Wages it. They play Stacked Deck, hit a Nocturne off of it, and then Ride it to score 2 points anyways (wow this draw looks really good for them!). They make the mistake of going to Papertree second instead of first, so their Nocturne ends up on Papertree. They pass with 2 runes up.
Turn 3 on 6 runes I use my gold to play a Seal and then use that to accelerate an Ekko to kill their Nocturne. They play a Kennen, and I think either cantrip or still hold up 2 runes. They aren't able to contest my Ekko, so this means I hold with Ekko to 2 points and we both get a rune from Papertree.
Turn 4 on 7 runes (plus one from Papertree) I play a Mel using my Seal and play a Forge. I pull back my Ekko. Their turn 4 involves conquering with Kennen, flowing Ride to conquer the other side, then flowing their Stacked Deck. They then play another cantrip, and then play a Ravenbloom Prefect, tapping out.
Turn 5 on 10 runes I conquer with Mel and Ekko to 4 points, then play a Seal and a Time Warp. On my Time Warp turn I have 9 runes (plus one from Papertree) and hold to 6, so I pull both back and play a Singularity to kill my opponent's two units.
My opponent now starts their turn at 4 points, no units, and 9 runes in play. They reveal a Divine Judgment that they've had in hand for a while, but if they play it I just win on points. I don't think they have any other plays to prevent my Ekko and Mel from conquering anyways, but even if they had some way to get to battlefields, I can still almost certainly combo them with access to 11 runes next turn.
So yeah, that's how you can beat Divine Judgment :)
4.11 - Helm of Suppression

If not removed, this card mostly bricks your combo. Unempowered, a tax of 1 energy on all your spells will make it more annoying to draw your deck, though you can still combo if you manage to. But once it’s empowered, you cannot combo without removing it. So if your opponent plays it and you have no way to remove it in your entire deck, you kind of become forced to play a fair game, which is quite bad for you.
While that sounds like it might be very scary, the truth is that that’s very much not the full picture, as the card is just extremely vulnerable to removal. It doesn’t tax you that much while you’re developing or digging - it’s a little annoying, but Clairvoyance costing 8 instead of 7 isn’t that big of a jump. And Clairvoyance gives you a lot of ways to dig for even a 1-of gear hate card.
Zaun Punk is by far the best way to kill Helm, as it doesn’t get taxed by Helm, and can’t be countered except my Not So Fast (which is unlikely to be in your opponent’s deck still). The extra cost is not nothing, but you will often have extra Forges or Gold lying around to use for it - paying a Gold to it is basically like the power cost on Salvage anyways. You can also Retreat your Punk to use it multiple times!
So, against a deck that you suspect might have Helm in it, you should side in at least one Zaun Punk. If you know for sure that they have Helm, you might want two; but I think it’s pretty reasonable to side in 1 copy speculatively too against any green deck that might have a Helm. A 3 might unit for 3 just isn’t that blank of a card, especially postboard.
4.B - Baltimore Extra - Combo Tempo
This section was not part of the original guide, but in-between Barcelona and Baltimore I thought of a good theoretical framework that might help explain both why the deck is fairly resilient to interaction; and how you can better play around interaction.
Right now, as Riftbound is a very new game, there isn't that much fundamental Riftbound theory that has been developed or written about. But if there's one piece of Riftbound theory someone has heard about, it's probably the concept of "point tempo". This is the idea that being ahead on points is very strong, specifically because the default "tempo" of the game is that players will score 2 points every turn. In this framework, holding a battlefield then becomes an extremely important way to swing point tempo back in your favor.
You might think that the concept of point tempo is less applicable to Lux. After all, while your opponent cares about scoring, you don't care about your own score, and you also don't have all that many ways to play the normal game of Riftbound enough to stop them from scoring. However, while it is less direct, we can still draw a very similar "clock" for Lux's victory condition, and apply the idea of tempo to that.
Earlier, I claimed that Lux's goldfish is basically 100% to win on turn 6 going first and turn 5 going second; and that it's 70% to win on turn 5 going first. Compare this to the normal scoring pattern of most decks: no points on turn 1, 1 point on turn 2, and 2 points every turn after that adds up to getting to 8 points on turn 6. Obviously you can accelerate this with scoring extra points (each point is roughly half a turn of speedup), but what this implies is that by default Lux is 0.5 turns faster going second; and up to 1.5 turns faster going first (1.5 turns faster is if you consistently win on turn 5 going first, but since you aren't fully consistent a better number might be something like 1.2).
Because of the extremely consistent nature of Lux, this notion of tempo is a lot stricter than what you might be familiar with when someone says a deck is "1 turn faster". This isn't really a claim that Lux is "0.5 turns faster on average" going second against an opponent who doesn't interact or score faster; this is saying that Lux is always 0.5 turns faster in those situations and therefore always wins.
With this framework, we can then model forms of acceleration or interaction as either speeding up the non-Lux player, or slowing down Lux. Every extra point scored is 0.5 turns. Each "turn" that Lux gets can even be approximated by comparing it to the normal things you get out of lategame turns - 10-12 energy, a card draw (which is worth 2 energy), and 2 runes (which are each worth about 1-2 energy, kind of), for approximately 16 energy of value. So a repeated Hard Bargain taxing 4 energy then looks like it's at best 0.25 turns. Similarly a Defy that counters a Sacrifice costs 2 cards and 1 rune which is also 0.25-0.4 turns. A Sabotage costs a card draw which would naturally be 0.1 turns, but can sometimes cause enough sequencing awkwardness to be worth 0.25 turns.
To explicitly map this out: every extra point scored is 0.5 turns. Weak interaction (Sabotages, Defies, Hard Bargains) translate to 0.25 turns. Strong counterspells (Abandon, Wind Wall) translate to 0.5-0.75 turns. Invert in some senses slows Lux down by a turn (it's hard to combo the turn immediately after Invert), but also drawing 4 cards is more than half a turn of output from Lux, so it's kind of like 1 full turn if you can immediately threaten lethal after but 0.5 turns if not. Helm costs some amoutn of energy plus forces Lux to play a Zaun Punk, so probably usually translates to about 0.6 turns, but can definitely be much more annoying if Zaun Punk isn't found quickly. Divine Judgment of course is the strongest interaction, costing Lux upwards of 3-4 turns.
From this, it might sound like beating Lux isn't that hard. Surely it can't be that hard to stack all of these ways of slowing down Lux, right? Well, it's not that simple. First of all, the easiest way of getting the "0.5 turns from scoring an extra point" is accelerating a unit, which has an extremely small timeframe (it has to happen on turn 1-2), isn't stackable (the second acclerate unit doens't do much), and is extremely easy for Lux to interact with (with Forgotten Monument game 1 all but locking out the option entirely; and triple Wages postboard doing a lot of work to prevent this). Secondly, while the 0.5 turn difference when Lux goes second isn't that hard to overcome, the 1.2ish turn difference when Lux goes first is much much more difficult, and Lux is so good at winning game 1 that you would mostly need to accomplish both in postboard games.
And finally, while Lux itself is extremely consistent in how it functions, the same cannot be said about other decks at all. Playing interaction isn't free, both in that it costs energy and often power, and in that every single interaction card you have for Lux is another card that probably doesn't help you at all with scoring. While the easiest way to think about interaction is in how it slows down Lux, it's also very relevant to realize that it also fundamentally slows down the player playing the interaction as well. And well, if your three Defies you were planning on adding up with an accelerated point was your plan of getting to 1.25 turns bought to beat Lux going first... that's going to work a lot less well if your Defies cost you some percentage of ability to function normally enough to take advantage of the acceleration. Your 1.25 might be looking closer to a 1.1. And again, if you're any amount slower vs Lux, you're mostly just dead.
The big takeaway here for what this means about playing Lux into interaction is that fundamentally, the only thing interaction does against you is slow you down. Even if it's slowing you down a full turn, or multiple turns in the case of Divine Judgment, there is no interaction that truly locks you out (unless you count an empowered Helm of Suppression when you don't have any gear hate). And since that is the only function of interaction against you, an effective counter to that interaction is to just slow your opponent down to match. Wages of Pain and accelerated Ekkos are both fairly low-cost ways of doing this - as "make a gold" is almost worth 3 energy and "put Ekko into play" is a thing you want to do anyways. And of course, postboard you have a lot of access to more random units and removal to slow your opponent down even more. It won't matter if an opponent buys 4 turns with Divine Judgment if you then remove all their units so they can't use those 4 turns to score.
5 - Matchups, Sideboarding, and Postboard Games
Riftbound is fairly young, so Lux sits as one of its first few combo decks. And as with the lifecycle of many combo decks, often the immediately obvious way to build it is to go all in - to maximize the combo, to dedicate everything in your deck to just comboing better and more consistently, etc. But this does not usually end up being a sustainable way to build a combo deck - the more linear you are, the more susceptible you are to opponents being disruptive of your plan.
So, as I often do for combo decks, I have built Lux to be more of a combo control deck, at least postboard.
For those who aren't familiar with the term: a "combo control" deck is a deck that is trying to leverage two extremely different pressures on the game to squeeze its opponent between a rock and a hard place. First of all, some sort of combo that goes over the top of what normal decks are doing; and secondly, a controlling gameplan that answers their threats.
This general archetype is extremely strong when built well, as your opponent is stuck with needing to play a worse proactive game in order to have tools for interacting with your combo; while at the same time needing to have a good enough proactive game to beat your controlling tools.
This is philosophically what I am doing with my Lux sideboard plan. You might notice that, while the maindeck has many cards that are less about playing the game of Riftbound and more about just purely drawing cards, the sideboard consists almost entirely of cards that can actually tussle in combat and contest battlefields in some way.
Take Mel, for instance. She looks kind of like an expensive luxury, as it costs 7 and a power in order to play and empower her, and at that point it's a little hard to get value against counterspells. Certainly her effect is not one that scans as useful in multiples, so it might look kind of weird that I have chosen to play 2 copies, when I have many ways to find the first by my combo turn.
But the truth is, an extremely large part of why I decided to register 2 copies of Mel in my sideboard is that it kind of just has a reasonable body, that can do some work contesting battlefields. Costing a power is not ideal, but it's fine if you can use a seal to pay for her. And just the existence of Mel often makes opponents spend resources to deal with the Mel in order to unlock their counterspells; or just give up on holding open their counterspells in the first place, not even forcing you to empower her.
The rest of the sideboard also shares these properties. Ashe is good for doing Abandon hand-checks and for tightening your infinites; but also is a 4 might unit that can take away a key card if your opponent hasn't put enough effort into holding. Wages primarily stops early scoring; but opponents are somewhat likely to side out their larger more expensive units. Ruination is a nice reset button that can sometimes leave opponents stranded with no units in hand, as they've kept only interactive spells.
This is all tied together with the power of Ekko. Being an 5 might accelerate unit that you don't really mind dying just comes up in a lot of spots, where you can accelerate to a battlefield, kill a unit, and then when they spend some resources to go contest it you can Sacrifice it and then play Clairvoyance as a Reaction with all the runes you just readied.
All of this adds up to being surprisingly good at presenting random holds with a couple of 4-5 might units backed up by a hidden Wages, or something similar to that. This can buy you a turn, and in extreme cases you can even take scoring tempo if your opponent just failed to enact their normal Riftbound gameplan because they were too busy trying to interact with you.
When you're playing postboard games, always look out for these spots.
5.1 - General Sideboarding Guidelines
I'm going to go into specific mapping more below, but first I'll talk a little bit about what each card in the sideboard is for, and what you usually want to cut.
Wages of Pain almost always comes in, as a way to slow your opponent down, while also being just a fine rate to pay for gold. The Ruination and Ashe also often come in, as Ruination is a very nice control card, and Ashe has a lot of random utility against counterspells and for tightening up your combo.
Progress Day is generally better in matchups where your hand is being attacked - so, Sabotage, Decree of Strength, and opposing Ashe - and worse in counterspell matchups, both in that it itself can be countered, and in that power is more costly if your Sacrifices are being Defied.
Mel is obviously a card for fighting counterspells, and doesn't get brought in otherwise.
Singularity and Falling Comet are bigger removal spells for playing a more extensive control game. This can be used for fighting cards like Ahri Alluring and Divine Judgment.
And finally,
Zaun Punk is exclusively there to kill Trinity Force and Helm of Suppression - there are no other gear you care enough about.5.2 - Matchups and Mapping
I had a rough sideboard mapping in mind going into Barcelona. I didn't always stick to it exactly (classic "all matchups vibes" moment), but I had a good idea for how I would sideboard against each matchup, and I think walking through some examples step-by-step would be good.
"STANDARD" Sideboard Map
-1 Sumpworks Map -1 Downstage Dramatics -1 Retreat
+2 Wages of Pain +1 Ashe, Focused
This is my default assumption of what I'm going to sideboard in almost every game. Map, Dramatics, and the second Retreat are the most cuttable cards from the maindeck; while Wages and Ashe have the broadest uses. I want 3 Wages postboard against basically every single non-Aurora deck, and Ashe is good against any deck playing counterspells OR Divine Judgment, which is quite a lot of them.
"WINCON SWAP" Addon
-1 Sprite Burst
+1 The Ruination
IF you have Ashe in your deck, you can basically freely swap between Sprite Burst and Ruination. Sprite Burst only exists to put infinite might on battlefields after your combo; but killing their entire board and then banishing their entire hand and then parking Ekkos on both battlefields should be good enough to win.
Kennen / Irelia / Purple Mapping
STANDARD Mapping + WINCON SWAP
-1 Progress Day
+1 Mel, Newly Awakened
-1* Time Warp or Shadow's Call
+1* Mel, Newly Awakened
Basically, against any purple deck where your main concerns are
Invert Timelines and counterspells like Abandon, you want to have one fewer Progress Day (as that is more vulnerable to counterspells), and access to some number of Mels. And since you want Ashe too, you can swap Sprite Burst for Ruination, and that will often be better.Whether you want one or two Mels is kind of a vibes-based decision. If your opponent is likely to consistently have access to Star-Crossed alongside Abandon, then it gets worse - but for example Kennen can struggle to hold up 5 runes with how much energy they spend, and Irelia doesn't always play enough units to leverage Star-Crossed that well. And of course if your opponent is also green the Mels get even better, as they have two colors worth of counterspells.
What to cut for the second Mel is interesting as well. My two best suggestions are Time Warp (because it is a riskier and harder to manage play into possible Abandons), and Shadow's Call (as a card draw spell that puts you down board presence, where board presence is kind of nice for enacting the controlling plan vs counterspells).
Kennen Tips (and Video!)

This can be a concerning matchup in theory, as Kennen has a lot of ways to dig very far through its deck for its powerful hammers (usually and Invert Timelines and an Abandon). And most Kennen decks play 2-3
Ride the Wind, representing a lot of ways of aggressively scoring.Still, we have a lot of moves. Wages stops their 2 from Riding (but not Kennen) and generally slows them down, and we can leverage Ashe and Mel to try to get around Abandon. It's a really hard to play matchup on both sides, with a lot of room for skill expression.
Forge of the Future is a very powerful tool here, specifically for managing what spells they have access to Flowing or Fizzing back from their Trash. Getting rid of any Inverts or Divine Judgments are obviously the highest priority, as well as any Barons if they're on the Baron reanimation plan. Ride the Wind is valuable to deny access to if you are trying to play a controlling plan. Star-Crossed is good to get rid of if you want to protect a Lux or Ekko that you are trying to leave in play for a turn; gear hate similarly if you are trying to play out Seals. And of course, getting rid of Lightning Rush (and to a much lesser extent Stacked Deck) limits how much they get to dig.
Keep in mind that
Tail-Cloaked Matriarch + Tornado Warrior lets your opponent play Fizz at reaction speed. The most relevant use case for this is the ability to replay an Abandon, but you can just prevent that by Forging the Abandon and/or the Fizz before you play your important spell.Also keep in mind that a Fizz that is hit off of a Promising Future can Abandon a spell that you chose. Usually your Promising Futures should be going for Ekkos though, so that should be fine.
As a bonus, here is a video of me walking through playing vs samdsherman (with a slightly old list - this set is actually what inspired me to put Promising Future back in the deck).
Irelia Tips

This is a matchup where the opponent can be weirdly vulnerable to the controlling plan, as they can often spend a lot of runes and resources to try and accelerate their units.
If you’re going first, try not to play Dredge Up or Downstage Dramatics on turn 1, especially in game 1. This will give them a card to banish to let them accelerate
Gust Monk.Master Yi Mapping

STANDARD Mapping + WINCON SWAP
-1 Ashe, Focused -1 Dredge Up
+1 Progress Day +1 Mel, Newly Awakened
Note that this sideboard plan involves having neither Ashe nor Sprite Burst; so you can kill all of your opponent's units during your combo but you can't banish their hand or make infinite might on battlefields. I think this should be fine vs Master Yi, as I think they don't have quite enough mobility to beat 20ish might on battlefields (Ekkos, Mel, and Scouts) plus three Wages (you can leave all your runes untapped).
The extra Progress Day comes in here as it is a Sabotage / Decree of Strength matchup. Mel is an okay hedge against them potentially having Crumbling Sands, but isn't at all necessary. I think it's worth playing 1 here, but definitely not 2. I'm not sure if Dredge Up is the best cut for it, but I think it's reasonable.
Not much to say about this matchup, it's mostly just pretty simple comboing.
Rengar Mapping and Tips

-1 Retreat -1 Promising Future -1 Shadow’s Call -2 Dredge Up
+2 Wages of Pain +1 Falling Comet +1 The Ruination +1 Progress Day
This is a very nonstandard mapping, for a very weird matchup. It's nominally a bad matchup, but I honestly don't think it's all that bad. I 2-0'd my Rengar opponent in round 11 at the RQ, after all.
The main issue is that, in addition to having several accelerate units like
Pyke and Kai'Sa, they also have Thrill of the Hunt. Thrill is an extremely powerful scoring tool for them, as a reaction-speed movement spell can almost always be played on your turn, scoring in a way that gets around even Forgotten Monument. But pay attention to the almost there - if you only spend your turn playing units and gear, and don’t have any Beginning step triggers, they never get a reaction window! This is especially valuable to do if they’re on 5 points, as it essentially guarantees you get another turn (unless they have two Thrills). Sometimes it can even be better to play nothing on your turn just to play around Thrill.The most productive ways to do this involve playing Ekko, Lux, and
Sumpworks Map. Ekko is a little dangerous because they probably play Rampage, but if it sticks it can be very productive. Map is extra nice in that it gives you a guaranteed Reaction window on their turn that you can then fit a Clairvoyance in - though it has the downside of producing a Temporary trigger they can play Thrill on top of on your next turn. As such it’s best played exactly when they’re at 5, if your goal is to deny them any Reaction windows.Postboard they also get access to
Brynhir Thundersong with their Thrills, which mostly just makes Thrill a little more effective at accelerating a turn, by letting it skip your turn. However, you also get a powerful tool in Ruination, which can somewhat undo a Thrill, unless they have a lot of acceleration.The impetus behind all of the sideboarding decisions is to play around Thrill, basically. We cut Promising Future because finding them a Thrill or Brynhir can be game-losing, and we cut some slow speed spells that draw cards as we don't want to be forced to give them Reaction windows on our turn as often. Map and Dramatics are kept in since they can get around this easier.
Finally, Falling Comet is intended as a way to counter a Thrill, essentially, by trying to kill the unit that is Thrilled. This is obviously not a perfect plan, as it doesn't work if they can just Ambush to that battlefield, but usually they aren't holding up enough runes to do that. Still, this is fairly untested, but I think I like it.
Baltimore Extra - Playing vs Rengar
I have now tested this sideboard plan a small amount in practice and can say that it does work the way I want it to! I've been actually pretty comfortable with the Rengar matchup - an experienced Rengar pilot that knows the priority tricks will definitely have a better time against you (shoutouts to MomSkyRB who beat me in Barcelona preregionals round 1), but you do have a lot of different moves between denying priority and playing Ruination. And them drawing only one Thrill mostly won't be enough if you play well, even if two Thrills is still quite hard to beat.
I also don't know how many red Pykes people are still playing in Rengar. Those were secretly the scariest cards, as an extremely cheap accelerate unit that can't easily be Wages'd and can be hidden to play around Ruination. I think Rengar without Pykes probably isn't favored into Lux (though it's probably still close) even when piloted well.
Ezreal / Mel / Lillia Mapping

STANDARD Mapping + WINCON SWAP (except vs Lilia)
While these are all decks that theoretically can have counterspells, I don't by default plan on bringing in Mel against them, for matchup-specific reasons.
Ezreal just has a lot of ways to kill units, so it's hard to play Mel proactively. Plus, they aren't usually going to have many Abandons, and also aren't usually going to be able to hold up energy for Abandon while still scoring quickly.
Mel and Lillia share the property of having a signature counterspell that gets around Mel. Rebuttal can steal spells even through Mel, and while Lilting Lullaby won't manage to counter the spell it targets with Mel in play, it will still prevent you from playing more cards that turn.
Ruination doesn't come in against Lilia because that deck just has a lot of acceleration through Sprites, making killing all of their units less productive for slowing them down.
Ezreal Tips
This is mostly a very easy matchup, but not entirely free - the main thing to keep in mind is
Baron Nashor, which is an acceleration tool that is hard to interact with. You can keep them off points earlier, which isn't that hard with Wages; or you can Ruination the Baron; or you can just win faster; but you do need to have a plan for it.The only other angle to worry about is if
Bewitching Spirit gets to discard too many of your cards. This is generally pretty hard for them to do, however, as you have a lot of ways to draw cards. Mostly this means you should not be keeping hands that are all lategame SETS with nothing to play.Finally, remember that Ezreal's legend can't draw cards if they have nothing to target! Playing Lux is often not worth it, as they usually can kill it. Playing a Forge can also be a worse use of energy than normal, as it gives them two targets they might be pretty happy to just cycle cards on.
Azir Mapping and Tips

STANDARD Mapping
-1 Ashe, Focused -1 Dredge Up
+2 Mel, Newly Awakened
We don't bother with Ruination here, as Azir has many accelerate units, most notably
Arise We also don't need Ashe, and would much rather have Mels, as Azir has no way to interact with Mel at reaction speed, and not that many ways of killing it on their turn either. As usual the Dredge Up is an okay but not great option for the cut.The main thing to note about Azir is that you should consider choosing to go second, both preboard and post.
Preboard the reason to do so is because
Guards (which is normally a 2- or 3-of) lets them score on turn 1 if they are going second, which would get around Forgotten Monument. Postboard, accelerating the Azir champion is another thing you can prevent by choosing to go second.I'm not quite sure where I land here. I think you're consistent enough that winning on turn 5 going second that you should probably choose to do so in the preboard game, where very few things can stop you - whereas if you're forced to win on turn 5 going first, you're a bit less consistent. Postboard is a little trickier, in that even if you choose to go second they can double score on turn 2 with Guards, so there it might be better just to choose to go first and deal with the accelerated Azir in some other way.
Also of note: Wages of Pain is a little less good at stopping early scoring in this matchup, as it does not fully work against Eye of the Heralds.
Related Tips - Pyke and Kai'Sa
The other two matchups where it can be correct to choose to go second are vs
Pyke and Kai'Sa, for very similar reasons.Pyke you should just absolutely always choose to go second, as they have a champion that cna always be accelerated on turn 1 if they're going second. Kai'Sa you don't need to worry about in game 1 when you have monument, but it's probably pretty reasonable to choose to go second postboard so they don't get to accelerate Kai'Sa on turn 2 - and notably, they usually have no other ways of accelerating.
Rek'Sai / Leblanc Mapping

STANDARD Mapping + WINCON SWAP
-1 Promising Future -1 Dredge Up
+1 Singularity +1 Falling Comet
This is the anti-Divine Judgment mapping. It should also hold for other Divine Judgment decks. It's possible that card just doesn't see any play in Leblanc sideboards, in which case you can switch to just playing the standard mapping + wincon swap for that matchup.
Ornn Mapping

-1 Downstage Dramatics -1 Promising Future -1 Dredge Up
+2 Wages of Pain +1 Zaun Punk
This is the anti-Helm of Suppression mapping. You want to keep both Retreats in order to be able to reuse Punk, and you want to keep in Map to have more gear to feed to Punk. Dredge Up is cut here since it's your most awkward card when Helm is in play.
Lucian Mapping

-1 Downstage Dramatics -1 Retreat -1 Sprite Burst -1 Shadow’s Call -1 Dredge Up
+2 Wages of Pain +1 Zaun Punk +1 Falling Comet +1 The Ruination
Lucian can score points extremely aggressively with
Trinity Force and Skyfall, so to fight that our plan is to just have more removal. We don't need to worry about much interaction, thankfully.Don’t forget that Skyfall + Trinity Force lets them score extra points on conquer, so removing Skyfall with gear hate is also productive, not just Trinity Force.
Baltimore Extra - It's Just Too Free
That said, not every Lucian deck plays the point scoring combo! In fact, both of the top 8 Lucians at Baltimore had 0 of either equipment anywhere in their deck or sideboard, which made the matchup extremely free.
Jayce Aurora Mapping

-1 Sumpworks Map -1 Downstage Dramatics -1 Wages of Pain
+1 Ashe, Focused +1 The Ruination +1 Progress Day
Purple Aurora Mapping
-1 Sumpworks Map -1 Downstage Dramatics -1 Retreat -1 Wages of Pain
+1 Ashe, Focused +1 The Ruination +2 Mel, Newly Awakened
The main difference between Jayce Aurora and Purple Aurora is that Purple Aurora gets counterspells and
Up From the Deeps. Jayce generally runs Time Warp, but we don't care enough about that to side out Promising Future, because we are generally playing Promising Future on our combo turn anyways.Note that Aurora is one of the few decks that can beat our maindeck wincon configuration - we don't have maindeck ways to clear backlines or empty hands, so with
Elder Dragon in play they can Flurry of Blades to kill all of our units on battlefields and then move in with their units. However, this does require them to actually have enough points to win, which is very hard for them to actually do because their deck does not score early. If they're at 4 points when you combo, they probably won't have enough resources to do this enough times to win. But even if they have somehow gotten good scoring tempo, you can beat this just by saving your Time Warps for the purpose of immediately winning on your combo turn instead - you really shouldn't need to use them to combo vs Aurora, as you can afford to slow down a turn usually.6 - Miscellaneous Tips and Tricks
There are a lot of small optimizations that go into playing the Lux deck well. While these are hard to categorize, they are (mostly) all still quite important.
6.1 Mulliganing
I touched on this briefly above, but you should try to avoid ever putting any Seals, Ekkos, or Sacrifices to the bottom on your mulligan (or on any Clairvoyance predicts), and should also generally avoid putting more than one Time Warp to the bottom. There can be exceptions if you believe that you really need to have early plays, and it can be sketchy to keep a full 4 copies of SETS with nothing to do in the early or midgame.
Beyond that, you should generally be looking for some of your strong early plays. Soaring Scout is premium in this regard for its ability to accelerate your runes, and Retreat and Wages of Pain are also great for this purpose (though Retreat mostly needs you to have either Scout or Forge).
In general I also like almost always keeping my first copy of Clairvoyance - though if my other three cards are some of SETS I might consider putting it back to find an early play. If my hand is very light on SETS then I will always want to keep at least 1 Clairvoyance or Progress Day, and otherwise mulligan maximally. I’m generally not too worried about keeping cheap early plays that aren’t Scout, unless I’m heavy on copies of SETS - so I might keep Ekko + Sacrifice + Seal + Dredge Up, but if the Seal was instead a second Dredge Up I probably would end up mulliganing at least one if not both Dredge Ups, even though that might make me not spend my energy on turn 1.
6.2 - Battlefields
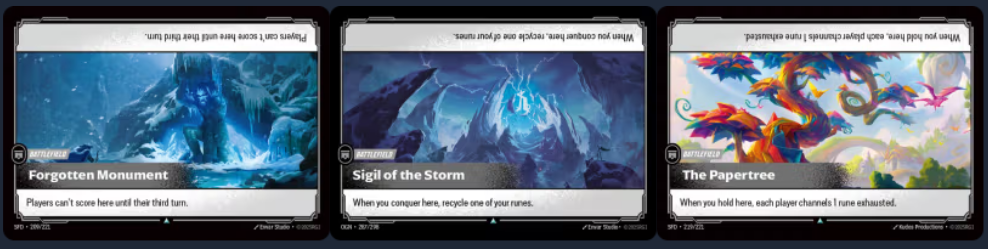
The default lineup for battlefields is:
- Present Forgotten Monument in game 1
- Present Sigil of the Storm postboard going second
- Present The Papertree postboard going first
This configuration seeks to maximize each battlefield in combination with how the deck is built.
First of all, Forgotten Monument works best in game 1 because it is the game that is most about goldfishing. Most people won’t have much interaction maindeck, and very few decks play maindeck ways to cheat scoring patterns through Forgotten Monument. You would need to have something that directly scores points (Swain, Trinity Force, etc) or an accelerated unit on turn 1 (Guards, Mister Root, Sprite Fountain kind of), or reaction-speed movement (Thrill of the Hunt).
If you can mostly guarantee that you are able to get your 6th turn going first / 5th turn going second, your goldfish rate is extremely high, so your winrate also becomes very high. Game 1 is the safest game to aim for this, as in postboard games more interaction can mess with your combo, making it less relevant that you get the full set of turns to combo with.
And since we plan on playing Monument in game 1, we get to play not much interaction for acceleration in game 1 - which makes our combo more consistent - and just plan to sideboard into 3 copies of Wages of Pain postboard.
That leaves the other two battlefields: Sigil of the Storm and The Papertree. It kind of makes sense for these to be the postboard battlefields, as when the game gets more interactive, it is nice to be able to either put your opponent down resources (Sigil) or accrue more resources yourself (Papertree). My reasoning for presenting Sigil going second and Papertree going first is threefold:
First of all, Sigil is more impactful when the opponent is on lower resources. If they are going first, they have one fewer rune compared to when they are going second. So it seems like a natural fit there.
Second of all, Papertree works the best when you can send your own unit there. If you play turn 1 Soaring Scout going first, and the opponent plays their unit, you can send Scout to Papertree and threaten to either get a rune from holding it or get a rune from the Scout dying - either way you get a rune. If they choose to kill the Scout, then they will be on Papertree, which makes it likely that they will hold it next turn and give you another rune. If they leave the Scout alone, then you will later get another rune off of it dying. Either way, it puts the opponent in a tricky spot where it’s very hard to avoid giving you extra runes early.
Finally, one of the most awkward parts of going second is that most of your cards, especially your cheap cards, have even costs. So it can be hard to use an odd amount of runes. The best card by far at solving this problem is Retreat - not only does it cost 1, letting you spend that odd energy; it also channels an extra rune to make future turns less awkward too, as now you have an even number of runes. And so I generally want to prioritize Retreat in my games going second - and I don't want to prioritize Retreat in my Papertree game, as it can become redundant quite quickly.
However, there are some small exceptions to this battlefield order.
Against a deck whose only way of accelerating an extra point is a 4-cost champion with accelerate - for example,
Kai'Sa - you can consider presenting Forgotten Monument specifically going first, as this will guarantee they can never break scoring tempo. This is pretty narrow though, as it doesn’t even apply to Azir - if you present Monument going first, they can beat that by playing Guards on turn 1.Amusingly
Pyke has the opposite property - you can consider presenting Monument going second against Pyke, as if they go second they can choose to accelerate Pyke on turn 1, breaking monument.Baltimore Extra - Misaligning Monuments
I had an amusing moment against Ali on Aurora where I considered how I should present battlefields to try and make our Forgotten Monuments desync. Basically, against any deck playing Forgotten Monument, you mostly want to misalign them, so that you get two Monument games instead of one. This is most relevant against purple Aurora, which plays both Monument and Up From the Deeps. Honestly you can probably just present a battlefield at random.
Opposing Battlefields
Don’t forget that your opponent sometimes plays battlefields that help you! Things like Zaun Warrens, Minefield, Candlelit Sanctum, Targon’s Peak, and Veiled Temple all have some potentially nice conquer triggers, which you can sometimes make use of with a Recruit or Scout.
However, be mindful that giving your opponent an action window can be very risky. The most common example is when you’re against a purple deck on 5 points - if you give them an action window by going to an empty battlefield, they can potentially
Ride the Wind into that battlefield to score on your turn, letting them break their scoring pattern. The same risk applies to decks with Rengar.Other Battlefield Considerations
The main battlefields I've seen other people play are
Threshold of the Gray and Ripper's Bay. The idea behind Threshold is that it lets you throw away your units for 1 energy each as long as your opponent has a unit on Threshold; the idea behind Ripper's Bay is that it lets you basically double up on your Retreats if you can send your unit in first.My main problem with both of these is that, while those upsides can be nice in theory, they don't come up much in practice, especially postboard (and Forgotten Monument is basically locked as your game 1 battlefield for how unique it is). A smart opponent can just avoid keeping units on Threshold on your final combo turn, and you don't have that many units that can productively move in on early turns. And between wanting to side down to 1 Retreat and often playing Retreat on the same turn I play a unit, Ripper's Bay just isn't very likely either. Plus, both require giving your opponent an Action window, which can be risky, as mentioned.
I have had someone ask if Sigil of the Storm is too much of a liability because theoretically your opponent can move your units into Sigil to force you to recycle runes. But this has never happened to me, probably because my opponents don't realize they can do that, but also partially because the deck just doesn't play that many units. And even if it does happen, it's not a huge blowout unless it's also killing your Lux - and I often am a little more cagey with my Lux in Charm matchups, unless I also have a Retreat to protect it.
6.3 - Tracking and Math
I would highly recommend practicing tracking various things. Make sure you always float energy in response to your Ekko trigger. Make sure you always float a power before Sacrifice resolves but after Ekko’s trigger resolves if you are Sacrificing with 12 runes in play.
A good shorthand is that ever Ekko + Sacrifice is neutral on power but gives you +energy equal to [the number of runes you have in play after playing Ekko minus 6]. You can use this to do some quick math to figure out how much energy you’re getting, which can be useful to know if you’re allowed to play a bigger card draw spell or need to stick to smaller ones.
Finally, it is extremely important to track what cards are on the bottom of your deck. You can write notes during tournaments, and I would highly encourage making use of that fact! There will often come points where you are down to 15ish cards in your deck and know 8 of them - knowing where exactly the next copy of Sacrifice is will help you determine the best way to get there. You will also often want to know how many cards in your deck you haven't seen, to get a sense of where remaining important cards that you've seen might be. Count your deck when it's relevant!
6.4 - When to Play Lux, Crownguard

Your Lux champion is very powerful. It staying in play for multiple turns helps a lot with your combo, especially because it can help you hit higher energy thresholds - for a simple example, if you start with 12 runes in play but no lux, you cannot play Clairvoyance as your first spell without putting yourself off of the possibility of comboing that turn, as Ekko + Sacrifice costs 6 before it makes any energy. But if you have Lux in play, suddenly you can use Clairvoyance to dig for Ekko + Sacrifice.
However, Lux is very vulnerable to backline unit interaction, which most decks will have access to. This includes things like Charm, Falling Star, Challenge, Star-Crossed, Bellows Breath, etc. Some unit interaction isn’t great against you (you almost never put Lux on a battlefield, and you will often have an expendable unit to get around Cull the Weak) - but most decks will have some way of punishing you for playing Lux.
So, it can be risky to put Lux in play. If your opponent removes it with an otherwise dead card, you kind of just spent 4 energy moving Lux from your champion zone to your trash. But the power of having Lux survive for multiple turns can often be worth the risk, and there are many ways you can mitigate the risk.
The first way to mitigate the risk is to just hold off on playing Lux until your combo turn.You’ll get less energy out of it this way, but it can still be valuable to spend 4 energy on putting Lux into play right after resolving your first Time Warp - if you resolve two more Time Warps after that, it will represent +2 energy net overall (from readying it during each of your 3 extra turns), not to mention the increased energy thresholds it lets you reach. This can be especially relevant for the purposes of playing around Hard Bargain, as described in the above Beating Interaction section.
But in many spots this tends to be a fairly low upside line to take. You can do a lot better than +2 energy out of your Lux a lot of the time.
The more common way you can look to leverage your Lux is to force your opponent to interact on an awkward turn. This most often happens early, as sometimes interacting with Lux will directly compete with developing units that can score points.
For example, against Diana, if you play Lux on turn 2 going first, they will need to have a 2 or 3 energy unit in order to be able to kill it with Moonfall while still developing. It’s even harder for them to productively Star-Cross it. Not to mention, forcing them to spend that power early can be problematic for them, especially if their goal is to represent many copies of Hard Bargain held up on your combo turn.
Against Irelia, their interaction is mostly just Charm, and not very many of their 2 cost units can productively fight a Lux on their own. They might need to use a trick to do so that early, which makes it both less likely and more costly to happen.
Another important consideration is whether forcing them to spend power to interact will make them miss critical thresholds. For example, Kai’Sa can be somewhat scary because they often play Time Warp - but they can’t Time Warp on turn 5 going first (the scariest possibility) if they spend any runes. And notably, almost every way they have of killing a Lux in base costs 2 power, which would force them to spend a rune - and a turn 6 Time Warp does nothing.
6.5 - Useful Rules Interactions
The Lux deck has a few interesting rules interactions you should be aware of. Some of these are unintuitive and somewhat likely to be messed up by the opponent.
Ekko Recycling is a Cost
This is very relevant and a very common misconception. The way that the
Ekko trigger is worded makes recycling him a cost you pay, and therefore not something that your opponent can react to before you do it. This most notably means that Disposal Order CANNOT be used to counter Ekko's trigger - by the time your opponent has the ability to play Disposal Order, Ekko will already be recycled.Predict Does Not Cause Burnout
You can in fact play
Clairvoyance with fewer than 5 cards in your deck without burning out.Promising Future
I'm not going to rehash everything about
Promising Future. If you want to read about how the rules around it work in detail, check out this Twitter thread.The most relevant thing to note is that your opponent cannot target the card you choose with the card they choose - whether that's them trying to remove Ekko or counter Time Warp. However, if they put a
Fizz in play, they can use it to play a spell from their trash that then could target your card.Also, you draw a Lux card from Promising Future resolving before any spells from Promising Future resolve, but after any when-you-play-me triggers from units or gear played with it resolve.
Priority Tricks
Remember to pay attention to when you can play reactions. If your opponent spends their entire turn not playing spells, triggering abilities, or starting showdowns, then you won't be able to play
Clairvoyance or Stupefy. So if there is a reason you wanted to wait until your opponent's turn for one of those cards, you should make sure to utilize windows when you get them.Temporary Scouts
If you have a temporary
Soaring Scout (because you played Shadow's Call on it), then at the start of your turn, before you channel your runes, it will die and channel a rune. Notably, if you have no other Beginning Step triggers, you will have no priority window to recycle this channeled rune before you go to your Channel Step and attempt to channel two runes. So, if you are at 10 or 11 runes before the Scout dies, this can cause you to forcibly channel one rune exhausted from the Scout before you get any ready runes for your turn, costing you 1 energy.If you have other Beginning Step triggers, you can simply choose to order them so that the Scout trigger does not resolve last. If you don't, then you don't really have any moves to prevent this. Consider not playing Shadow's Call on your Scout in those cases.
7 - Cards I'm Not Playing
There are a few cards that I've seen people talk about putting in Lux that I'm not playing. I am fairly confident in my decision not to play them, but figured it would be worth elaborating here to head off questions.
7.1 - Renata Glasc, Mastermind

I already touched on why I'm not playing this earlier when talking about winning, but just to reiterate: I think it is not unreasonable to play Renata and Jayce as an infinite point combo in the sideboard exclusively as a crutch if you believe you are likely to go to time. But ideally, you should try to practice the deck until you can play fast enough to not need that crutch. If your opponents are slow playing, call a judge!
7.2 - Otterpus

You would think that Otterpus would be good here in order to slow the opponent down. But I don’t think it’s at all worth it, for a couple reasons:
First of all, I’m already playing Forgotten Monument game 1. This prevents most forms of acceleration anyways, and Otterpus would only really take the opponent off of an odd scoring pattern back to even in the Monument game. Obviously this makes it harder for opponents who can still cheat points even through Monument - but very few decks can do that, so I’m not worried.
So Otterpus would mostly be a postboard consideration. But postboard, I’m already planning on bringing in 2 more Wages to counteract acceleration. And while it has a lower ceiling than Otterpus, it has a much higher floor - past turn 2, Otterpus is literally blank, while you can actually often find yourself wanting to spend 3 energy just to make a gold.
Plus, Wages is a part of tying together other sideboard plans too. It’s a big part of making the beat-Divine-Judgment plan work; the gold it makes can be used for Punk; and it’s nice for surprise holding to buy a turn when your opponent slows you down a lot.
Okay, so then what about playing both Otterpus and Wages? Well, that’s mostly a factor of there being a limited amount of “terminal” cards you are allowed to play. If you play too many cards that don’t draw more cards, you start getting stuck with a lot of hands that can’t productively spend their energy developing, which starts getting really bad really quickly. I just don’t think the added inconsistency is worth it.
And finally, I have plenty of other sideboard cards I think are valuable in other ways.
7.3 - Applied Researchers

Applied Researchers got some hype from a Lux list early in Vendetta that did well in an online tournament, but it's just a really bad fit for the strategy.
First of all, the most explosive way to power through your deck is to play a few large card draw spells, not many cheap card draw spells. Applied Researchers is best used in combination with cards like Dredge Up and Shadow's Call, but doesn't do nearly as much when your goal is to play Clairvoyance, Sacrifice, and Time Warp.
It's just not that easy to recoup the 7 energy you spent on Researchers. You'd have to play 7 spells, or get a lot of utility out of the power it's saving you; and you'd have to deal with the fact that paying energy upfront in large chunks can be hard.
But most damningly, Researchers is just so vulnerable to unit removal. Spending 7 on a Researchers that gets Star-Crossed is a surefire way to lose. If not for unit interaction, maybe Promising Future could be an okay way to leverage Researchers - but it's pretty bad when your Promising Future lets your opponent play a card that burns 7 of your energy.
The Lux deck is simply too consistent without it to want to play Researchers.
7.4 - Other Maindeck Considerations
The maindeck as built is currently pretty locked, with a very small number of flexslots. Obviously you want 3 copies of all of your SETS. I think 5 big card draw spells main and 1 more in the sideboard are pretty much the perfect numbers. Wages of Pain, Promising Future, and Sprite Burst are important 1-ofs to have access to. Forge is good to play 3 of because recycling Sacrifice is quite important; and besides, being able to play a unit early for Shadow's Call and Retreat is also good. Scout is your best early play, so also should be a 3-of. Stupefy, Shadow's Call, and Dredge Up are your best small card draw spells, and are all actively good in ways that probably mean you should play 3 of each.
That leaves 4 flexslots: the 2 Retreats, 1 Map, and 1 Dramatics. I currently enjoy having access to Retreat consistently, as I find you are most often constricted on runes. Plus, it's very nice for turning your odd-energy-curves into even-energy-curves going second. Map and Dramatics then are just there to fill space. Map is more powerful, but I've chosen to not play 2 because I really dislike that you cannot play it productively on your final combo turn. But these are just the choices I've made; I think there are a lot of cards you could play in these 4 slots that would make sense. I would highly recommend not cutting the all your Retreats though, as the card is just very nice to have access to.
Finally, you could think about swapping out Wages and Sprite Burst for other similar cards. I said they were necessary, but mostly in the sense that you need some way to win with your loop. I've liked Sprite Burst because it at least draws a card for 5 energy if you have nothing else to do early. Wages is necessary along with it in case your opponent controls a Vex - but also I really like Wages, so that's not really an issue for me. Other possible cards you can play in this spot include Ruination + Ashe; or any unit removal + any Sprite maker. However, I'm not convinced anything is better than Wages + Sprite Burst.
8 - Advanced Combo Math
It turns out that you can actually do some amount of math to predict whether you can successfully combo from various board states. It's somewhat complex, and not necessary for playing the deck well, as it is mostly a more precise analysis of something you can get an intuition for. However, this math might be useful for helping build that intution.
So if this section is intimidating, feel free to skip it. I certainly only did the exact calculations a couple times during RQ Barcelona, in spots that involved very close decisions. But for those who are interested, the (relatively) shorthand calculation what to think about is as follows:
Assume you start your combo turn having not used any copies of Ekko, Sacrifice, and Time Warp; and have E energy, C cards in your deck, and R runes+seals+gold in play. The most common combo pattern (Forge back two Sacrifices as soon as possible, play all three Ekkos, Sacrifices, and Time Warps) will roughly succeed if you can successfully spend E+9 energy to draw C-9 cards and channel 17-R extra runes.
Your available tools to accomplish this feat are as follows:
- +6 energy (in addition to the 2 that Lux is making this turn) if Lux is already in play
- +2 energy if Lux is not in play but you can play her before your first Time Warp
- Every Ekko trigger is assumed to ready 11 runes - each one that readies more or less is +/- some amount of energy
- Similarly each Time Warp is assumed to start your next turn with 10 runes
- Every seal you put into play channels T-1 extra runes, where T is the number of Time Warps it is played before (so if you play a seal before your first Time Warp it gives +2 runes, before your second Time Warp is only +1 rune)
- There are many ways to turn 2-3 energy into 1 rune (Retreat, Scout)
- There are many ways to turn 2 energy into 1 card (Dredge Up, Clairvoyance)
- There are some ways to turn 1 energy into 1 card (Stupefy, Shadow's Call)
- Clairvoyance AFTER recycling Sacrifices turns 7 energy into 7-8 cards
- Promising Future, if you are willing to play it, digs 6 cards basically entirely for free (the power it costs comes at the very end so is mostly fine)
For example: if you start the turn with 12 runes and Lux in play, you have 14+9+6 = 29 energy to draw C-9 cards and channel 5 runes. If you have two Seals in hand (but none in play already) then that reduces the number of runes needed to 1, which you can expect will cost 2 energy to recover (unless you draw your third Seal before your second Time Warp). So you have 27 energy with which to draw cards, roughly. If you imagine playing one Clairvoyance, two Stupefies, and one Shadow’s Calls, that’s 11 energy for 11 cards, and the remaining 16 energy can probably draw 8 cards, even without playing Promising Future.
So, if things go normally, that would mean that 27 energy can probably draw 19 cards. And if we match that with the C-9 number, that means we can probably win even if our deck still has 28 cards in it. Notably it’s extremely hard to have more cards than that left in our deck, as we probably have drawn at least 9 cards from just our opening hand + natural draws, putting us at 30 cards maximum. This example gives us an inkling of why goldfishing the combo is so consistent.
8.1 - How Exact is This?
There are a lot of weird things that can make this math be off by some amount. The biggest thing is that sometimes you fail to draw the correct card by the time you need it - either not drawing enough Seals early, or not drawing Time Warp or your second Ekko+Sacrifice pair when you need it. The math here assumes that all of that goes relatively smoothly - in fact the reason why I advocate for not putting copies of SETS to the bottom on your mulligan is because the math gives such a consistent result when you can play everything on time.
Beyond that though, sometimes you have weird lines that can give you extra resources or lose some resources. In your Papertree game you can get extra runes for free by putting a unit on Papertree before Time Warping. Sometimes your way of getting more runes is attacking a Scout into a battlefield, but sometimes that isn’t a line that is available (maybe you want to play around Ride the Wind) and instead the best you can do is to use Retreat, which costs minimum 3 energy - even worse, sometimes your way of getting an extra rune is playing a Wages of Pain, which only works if you do it before your second Time Warp.
Sometimes one of your pieces is gone for some reason. Maybe you already used it, maybe it was banished with Ashe, maybe you know you bottomed a Time Warp and so won't really get to it in time. Every Time Warp you don’t play is another 2 cards you need to draw, and 2 less energy and 1 less power made from Lux and each Seal; but also 2 fewer runes you need to channel. If you’re missing one Sacrifice it’s -5 energy and +2 cards needed. Missing two Sacrifices makes things mostly impossible unless you're quite deep into your deck - this is part of why it’s dangerous to mulligan Ekko and Sacrifice.
The math here also assumes that your goal is to have roughly 11 runes when your deck is empty. This allows you to perform the normal infinite energy loop, as opposed to the 9 rune infinite energy loop. However, this isn’t actually necessary, and isn’t actually the reason I’ve used 11 as the goal - the actual reason is that most of my math assumes that you’re hovering around the 10-11 rune range when you play Time Warp and Ekko+Sacrifice. If you’re lower than that, then you’re also going to lose energy relative to my calculations every single time you play a Time Warp or an Ekko+Sacrifice, so you generally want to stay around that range anyways. But this isn’t a hard and fast rule. You can combo on fewer runes, and not bother about channeling fully back up to 11, as long as you can work with the lost resources from Ekkos and Warps.
8.2 - But... Why?
The biggest application of actually doing this math is to figure out how likely it is that you are able to play around certain kinds of interaction. After all, if your opponent doesn’t have any interaction, your combo should be extremely consistent.
For example, you might wonder if you have enough resources to pay for one repeated Hard Bargain plus on non-repeated Hard Bargain. Well, consider doing the math and seeing if having 6 less energy seems tenable - though that case is a little weird because you also need to make sure all your Time Warps are played with 6 energy left to be able to pay.
If you want to play an Ashe before your first Time Warp to play around one Abandon, figure out if you will have access to 5 extra energy and 1 extra rune. If you want to play a Mel at some point, figure out if you will have access to 7 extra energy and 1 extra rune - though remember that she also draws you a card. If you do the math and it seems unlikely that you will have enough energy for these plays even if things go well, then maybe your best line is to hope they don’t have it and go for it, or try to buy a turn by contesting battlefields.
8.3 - Common Variations
So the default numbers here would be E+9 energy to draw C-9 cards and channel 17-R runes.
Now say you’re trying to play around two copies of Defy. Well, you can assume that each of those Defies will go after a Sacrifice, and thus cost you 2 cards and 1 rune each. So now the numbers are more like E+9 energy to draw C-5 cards and channel 19-R runes.
Now say your opponent has Sabotaged first a Sacrifice and then a Time Warp. Well, we can apply similar principles of “how do we get to our 4th Sacrifice”, but reframe it as being down one Sacrifice and a Time Warp, treating the Sacrifice that was Sabotaged as our “fourth”. Since Sacrifice is the second-to-last card of our deck, we need to draw two fewer cards, and then another two fewer cards because the first two Ekkos will go below our “fourth” Sacrifice.
So adding that all up: -4 cards needed from our weird situation, -5 energy +2 cards needed from missing a Sacrifice, and +2 cards -2 runes needed plus our Seals and Lux are worse from missing a Time Warp. So we have E+4 energy to draw C-10 cards and channel 15-R runes, and our Seals and Lux are worse.
Finally, consider what happens if you want to try comboing without ever playing Time Warp. Well now you don't need to channel any extra runes really (you need to get to 11, so 11-R), but you need to draw 6 more cards and your Seals and Lux don’t add any bonuses. So, the numbers are E+9 energy to draw C-3 cards and channel 11-R runes.
But maybe what you actually want to do by doing this is play around exactly one copy of Abandon or Crumbling Sands. So basically you want to avoid putting Time Warp on the chain unless your opponent chooses to use their Abandon/Sands. So you want to threaten to win without needing to use Time Warp, but you want to be able to play Time Warp if they decide to Abandon your Clairvoyance or something like that.
So then basically you want to have 10 energy available at all times. You can probably assume that if they use Abandon/Sands and you have 10 energy left you can just play your Time Warp and be fine (maybe you have several seals in play). And before we were assuming that you had 6 energy left at all times anyways (to have access to Ekko plus Sacrifice at the end of your combo), so basically we’re just assuming you’re tying up 4 more of your energy.
So then the numbers become E+5 energy to draw C-3 cards and channel 11-R runes. If you assume normal conditions of having 12 runes to start, then this looks like 17 energy to draw C-3 cards. Probably 17 energy can play 11 energy of 1:1 energy-to-card ratio (one Clairvoyance, one Shadow’s Call, two Stupefies or second Shadow’s Call), and then 6 energy of 2:1 energy-to-card ratio. This adds up to 14 cards, so you can almost certainly choose to play around Abandon this way if you have 17 or fewer cards left in your deck. This isn’t easy, but also isn’t impossible.
8.4 - Showing the Math
The math comes from the following:
I assume that each Ekko + Sacrifice pair generates +5 energy (11 runes) and draws 2 cards; and every Time Warp costs 2 runes and 0 energy (your next turn starts with 10 runes) and draws 2 cards.
So we are getting +15 energy +6 cards from three Ekko+Sacrifice pairs, and +6 cards -6 runes from three Time Warps.
Our goal is to draw our fourth Sacrifice. We can assume that we are going to put two Ekkos on the bottom above our fourth Sacrifice, so we will need to draw C+3 cards to reach that Sacrifice, where C is the number of cards currently in our deck. When we get there we need to have at least 6 energy left to play Ekko + Sacrifice.
So, we have E+15-6 = E+9 energy to draw C+3-12 = C-9 cards. Replacing the 6 runes the Time Warps cost is then where the "17-R" number comes from, though as mentioned that one is the most handwaved number.
9 - DON'T DO THIS EVER: Infinite Burnout
I MEAN IT, NEVER DO THIS
Baltimore Extra - REALLY DO NOT
I have confirmed with the head judge of the Baltimore Showdown that actually executing the following "loop" is considered slow play.
The purpose of this section is twofold: first of all, as a fun fact that is interesting to know about. And secondly, as a highlight of just how much this deck should be banned.
---
You should almost always be able to win with some combination of infinite units, clearing your opponent’s board with Wages or Ruination, banishing their hand with Ashe, and recycling their trash with Forge. However, there are technically a couple of spots where that might not be the case:
First of all, against a deck that can go infinite itself, even if you banish their hand you might not be fully safe. You could also theoretically always lose to your opponent playing Invert, then Invert again, then Fizzing an Invert to force you to draw 12 and burn you out (you can’t recycle more than 12 cards once you’ve emptied your deck).
Secondly, you could run into time issues. If you are relying on winning by making it so that your opponent can’t score for the rest of the game, you still need to take 2-3 more turns in order to actually score to 8 yourself. And this may be impossible if time has been called and you are in turns. The best solution to this, of course, is to just play reasonably quickly, and be vigilant on not letting your opponent slowplay either. However, it can still happen.
In any of these cases, there is technically a way for the deck to score infinite points against some decks, without needing Renata. It just happens to be extremely cursed, and borderline infeasible within the time constraints of the tournament.
The basic idea is as follows: once you have made infinite energy and power, you can also infinitely play any spell. Notably, you can do this with Promising Future, which ahs the effect of forcing your opponent to play a card from their deck.
Interestingly, the way that Promising Future works is that they must play the card they chose if they are legally allowed to, but don’t have to recycle runes for power so can decline to play anything that costs power. Any card that isn’t able to be played simply stays in banishment.
So, you can loop Promising Future to force your opponent to play all their cards. Every card will be either played or banished, until they run out of cards in their deck. Then, at that point you can recycle a specific card in their Trash to force them to play that card. So if they have any card that draws a card - for example, Scuttle Crab, Lonely Poro, or Stupefy - you can force them to play that card while their deck is empty, thus causing them to burn out, scoring you 1 point.
Then you do that all again, until you score enough points to win.
You do have to be able to survive them playing all their cards - but thankfully, most spells do nothing, even counterspells. You mostly need to watch out for Ashe, Focused (repeatedly banishing cards from your hand will not let you truly loop) and Brynhir Thundersong (for obvious reasons); while needing a more specific set of loops to do this through Divine Judgment and Invert Timelines.
The cursed part of this is that, because the result from Promising Future is nondeterministic every time, you cannot shortcut the loop. So you have to actually play out every Promising Future. You are allowed to shortcut the similar actions around that, but the language there is also fairly precise. Attempting to do this in a tournament is likely to result in the judge penalizing you for slow play. This is more of a fun fact, or something you can explain to your opponent and hope they concede to, than an actual thing to actually do.
I CANNOT STRESS ENOUGH HOW MUCH YOU SHOULD NEVER EVER EVER EVER ATTEMPT TO DO THIS IN A TOURNAMENT.
If you attempt to actually fully execute this, the proper response from judges would be to tell you that doing so constitutes slow play, and therefore you are not allowed to.
A both more and less cursed version of this loop, which is maybe a little more feasible, is trying to put all of your opponent’s cards in banishment or in play. Specifically, this works if your opponent’s deck has ONLY units, gear, and spells that need targets or power or draw cards left.
You can first force them to play every card in their deck without any units on the battlefield by playing Ruination before each Promising Future. This will leave all of their targeted spells in banishment.
Then you can repeatedly recycle their spells that cost power and force them to keep playing them or banishing them until they run out of power and all their spells are banished.
Finally you can recycle all their units and gear and force them to put everything into play. Then, simply pass the turn, and they will have an empty deck AND trash, which will cause them to infinitely burn out when they try to draw.
This is extremely hard to engineer, as most decks play some spell that doesn’t require power or targets. Stacked Deck and Flash make most purple decks immune to this, for example. Spells that make tokens like Sprite Burst and Guards also avoid this.
STILL NEVER DO THIS.
10 - Conclusion
Lux is an extremely strong deck, and absolutely needs to be banned. The fact that it has several 100% matchups and many 80% matchups, while its worst matchups are like 40% at worst (maybe other than Time Warp Mel) is pretty egregious. And it is just not a fun deck to play against.
I would say that at Barcelona I played against two 90% matchups (Ezreal, Shen), four 85% matchups (Leblanc, Yi, 2 Azir), two 60% matchups (2 Kennens without maindeck Invert or Abandon), two 50% matchups (Rengar, Kennen with maindeck Invert), and one 30% matchup (Time Warp Mel). And I thought this was on the unluckier end of matchups to have faced, which is kind of an insane statement to be able to make. Certainly I didn't get fed three Ezreal players in a row, unlike the other Lux that did well :P
My opponent's at Barcelona were generally pretty good sports. I got quite a few compliments for playing very quickly and clearly. But there were certainly several opponents who were at least a little frustrated that they essentially weren't really being allowed to play the game, and that frustration was pretty valid.
Wanting a more diverse range of decks to exist is a pretty valid goal for Riot to have, but Lux is not the way to do it. It's the most uninteresting kind of combo deck possible because of how consistent and uninteractible it is; it's too good; and it has real time concerns too, as bad Lux players can be extremely slow.
So yeah, Riot please ban this. But until they do, I'll probably be doing my part to try and force them to take action, by continuing to win. And hopefully, this guide may have helped you do that too.
8/24 update: added navigation
8/25 update: fixed some typos, added more card image hovers
9/13 update: Baltimore Extras
9/14 update: Combo Tempo

#FreePalestine | Consider donating to UNWRA or PCRF, supporting protesters locally, and educating yourself.